Configure SSO for Admin Console using Google Workspace as Identity Provider
The Admin Console of NirvaShare can be seamlessly integrated with Google Workspace to enable Single Sign-On (SSO) using the SAML 2.0 protocol.
In this document, we provide a step-by-step guide to configure Google Workspace with NirvaShare, allowing users to securely log in to the Admin Console using their Google Workspace credentials.
Prerequisites
As prerequisites you should:
- Make sure NirvaShare is installed either on cloud or on premise. You can also directly install from AWS Marketplace or follow the Manual Installation.
- Configure the Storage and User Application URL. For details check HERE.
- Make sure a valid domain name and SSL certificate is configured for Admin Console.
- You must have administrator access to your Google Workspace console to configure SAML-based authentication.
Google Workspace Configuration
- Login to Google Workspace admin console https://admin.google.com
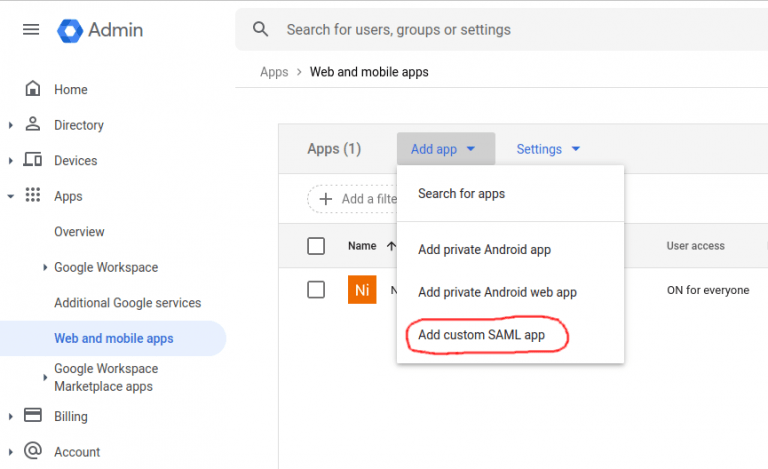
- Click on Apps – >Web and mobile apps from the left menu tab.
- Click on Add custom SAML app.
- In the app configuration window, for the app name provide a name say NirvaShare-AdminConsole.
- (Optional). For the app icon, upload an image for NirvaShare.
- Click on CONTINUE.
- Once again click on CONTINUE.
- This will open the screen for Service provider details.
- For ACS URL enter https://<your domain>/saml/0/acs
- For Entity Id enter https://<your domain>/saml/0/metadata
For Example, https://admin.yourcompany.com/saml/0/acs and https://admin.yourcompany.com/saml/0/metadata
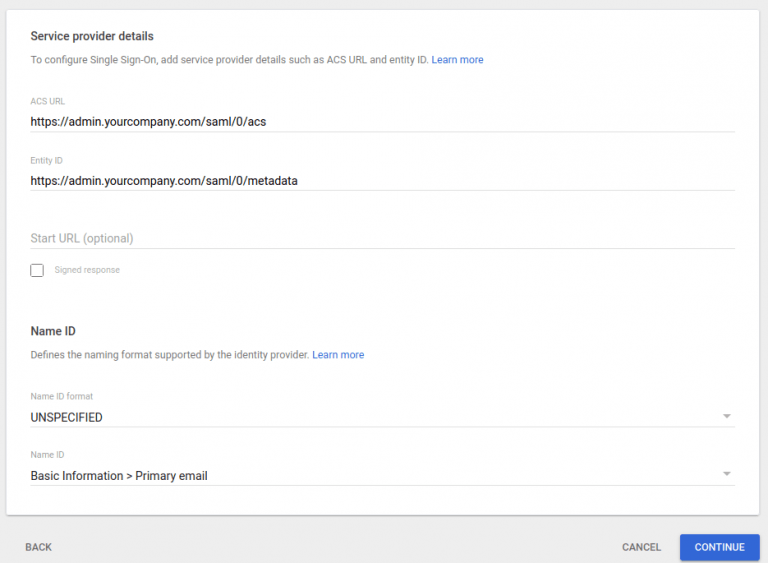
- Click on CONTINUE.
- In the next screen, click on FINISH.
- In User Access page, make sure to give application access to users.
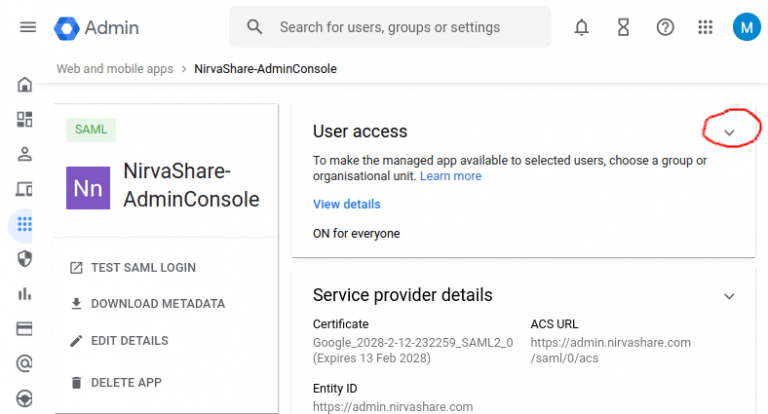
- Select ON for everyone in case if you want to give access to all users from the Google workspace account.
- For selective user access, please make use of group or organization unit instead of ON for everyone. In such cases, create a group or organization unit, assign only those users requiring access to the app.
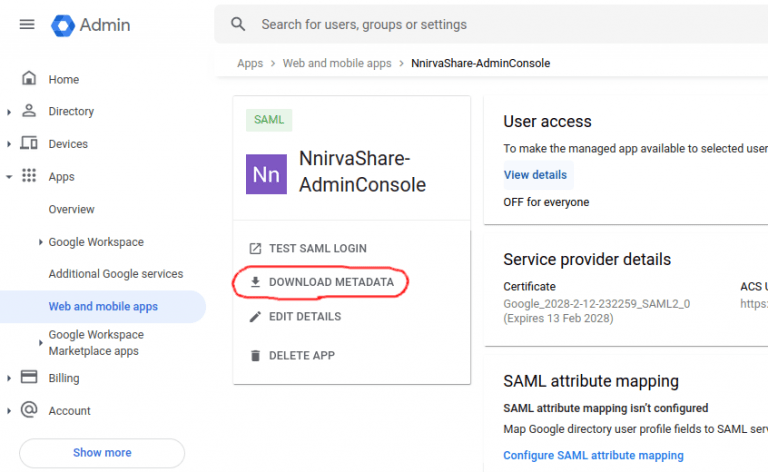
- In User Access page, click on DOWNLOAD METADATA.
- Download and store this metadata file into your local file system and we will require this file content while configuring the NirvaShare Admin Console.
NirvaShare Configuration
Now that you have the SAML metadata file of Google Workspace identity provider, please refer to the below documentation to configure SSO for AdminConsole of NirvaShare.
Once the configuration is complete, please open Admin Console https://<your domain name> which will redirect you to Google Workspace login page for authentication. Upon successful login, you will be granted access to the Admin Console through Single Sign-On (SSO).