How to Share and Manage File Access from AWS S3, Azure Blob with Salesforce Users
Salesforce is the world’s most trusted cloud-based customer relationship management (CRM) platform. In this document, we will explore how NirvaShare can be used to enable secure file sharing and collaboration for Salesforce users. NirvaShare integrates with object storage solutions like AWS S3, Azure Blob, DigitalOcean Spaces, and others, allowing seamless file access.
With NirvaShare, you can provide granular read/write access to files and folders for Salesforce users. This access can be securely managed through Single Sign-On (SSO), ensuring a seamless experience for users without compromising security.
Prerequisites
As prerequisites, make sure you have the following.
- NirvaShare, installed either on cloud or on-premises. You can also directly install from any Marketplace, check HERE.
- Configure the Storage and User Application URL. For more information refer HERE.
- Make sure proper domain name and SSL certificate is configured for Admin Console and User App.
- You will require access to your Salesforce as console administrator.
Note: For more information or in case if you require support, please contact us HERE.
Login Profile
In order to create a Login Profile in NirvaShare, you can make use of the following steps.
- Log in to the Admin console of NirvaShare as an administrator.
- Click on Login Profile from the left menu of the admin console.
- Click on CREATE button from the top right corner.
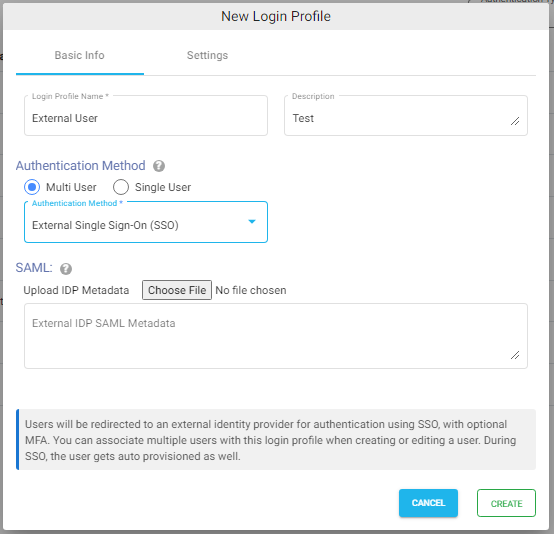
- Under the Basic Info tab, provide a name for the Login Profile Name and an optional description.
- For the Authentication, select External Single Sign On (SSO).
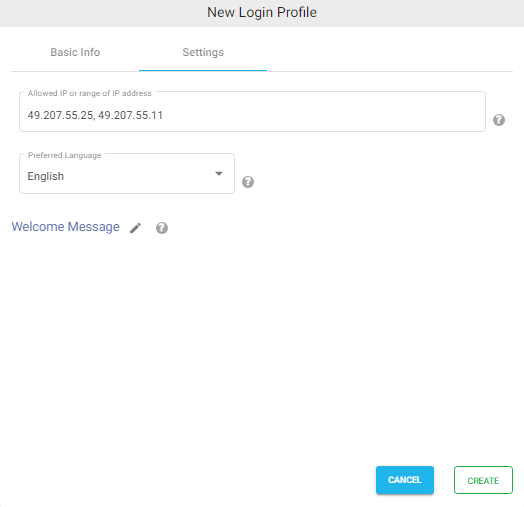
Settings
- Click on the Settings tab.
- (Optional) To restrict access to only certain whitelisted IP address or a range, please refer to Access Restriction with IP Address
- Choose the language in the Language field. By default, it is set to English.
- (Optional) While accessing this share, a welcome message can be displayed to the user. Please refer to Welcome Message for the Share
- Click on CREATE button to create the Login Profile.
SAML Metadata
For external identity provider integration, you will require SAML metadata from the login profile of NirvaShare. To obtain the SAML metadata for the newly created login profile, follow the below steps.
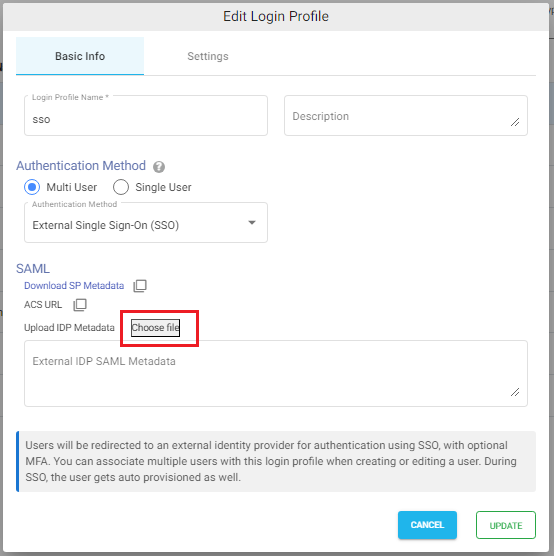
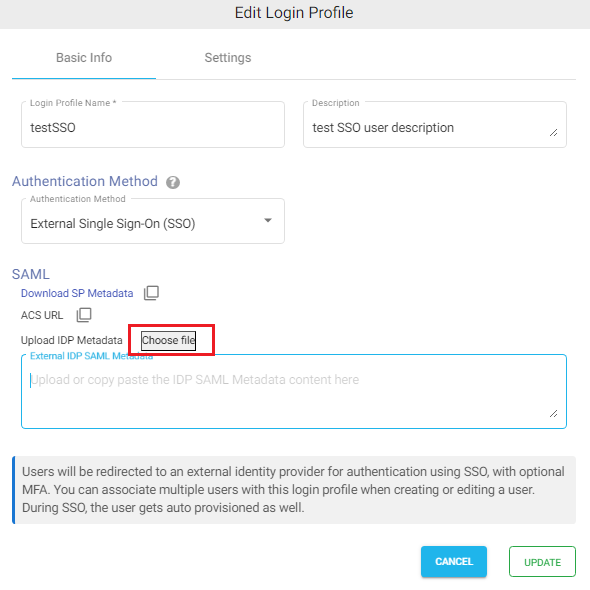
- Edit the newly created login profile.
- Click on Download SP Metadata, or copy the URL to the clipboard and open it in a browser tab.
- This will download the XML metadata file for NirvaShare.
- This metadata file will be required to configure the external identity provider. So please save this file locally for further reference.
Note – At a later stage, you will also require SAML metadata from the identity provider and content of the same has to be pasted in the textbox and saved in the login profile.
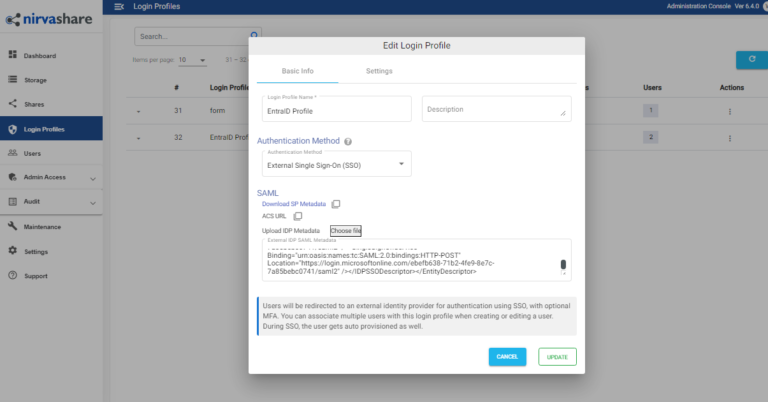
Updating Login Profile with SAML Metadata
Make sure you have the SAML metadata XML file obtained from external IDP and follow the below steps to update SAML metadata in the Login Profile.
- Log in to Admin Console as an administrator.
- Click on Login Profiles from the left menu of the Admin Console.
- Edit the existing Login Profile of type External Single Sign On (SSO)
- In the Upload IDP Metadata section click on the Choose File button and select the metadata file.
- Click on UPDATE.
Salesforce Configuration
We need to create an enterprise application in Salesforce to integrate with NirvaShare:
- Sign in to salesforce portal https://login.salesforce.com/
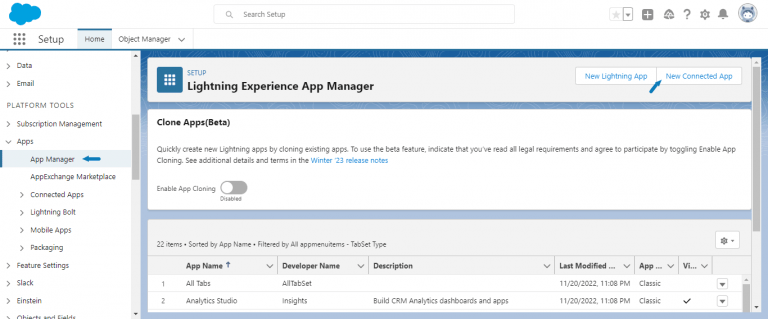
- From the setup left menu list, click on App Manager.
For more information on connected apps, please refer HERE.
- On the top Right menu, click on New connected App.
- Provide the name as NirvaShare along with your email ID and click on Create.
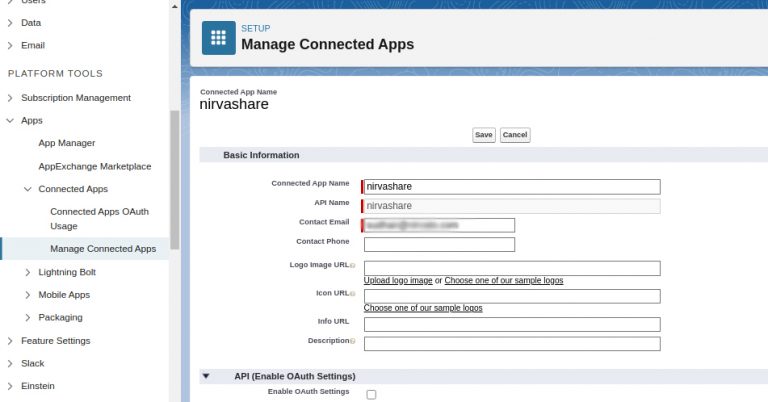
- After creating the app, go to Web App Settings .
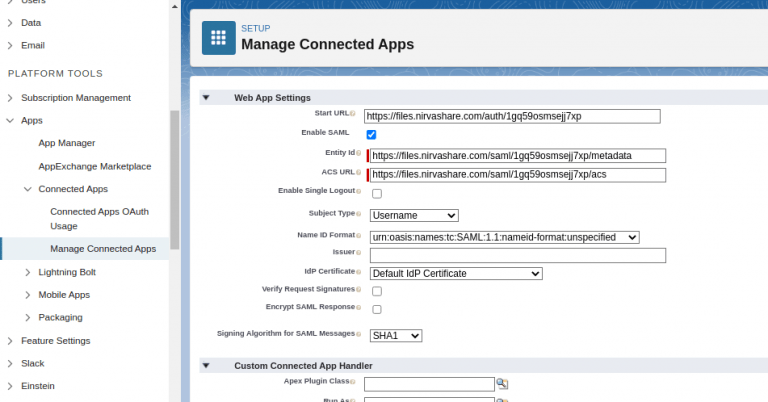
- We need to enable SAML, enter the start URL, Entity Id, ACS URL of NirvaShare. This information can be found from the XML metadata content obtained from Login Profile of NirvaShare based on steps in the previous section.

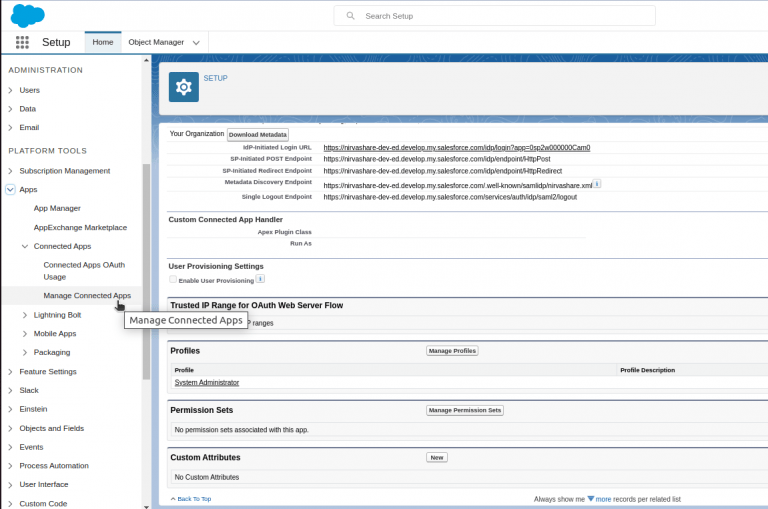
- Download the Salesforce Metadata XML file from SAML Signing Certificate section. Save it into your local file.
- This file content will be required while configuring Login Profile in NirvaShare Admin Console.
- To assign users to this connected app, either use existing Salesforce profile or create a new one and assign the profile to the connected app.
- To assign the profile to the connected app, click on Managed Connected App > Manage Profiles > Application Profile Assignment.
- Login to NirvaShare Admin Console and edit the Login Profile that was created based on the steps from previous section.
- Copy pastes the Salesforce metadata file content from previous steps into the text area of External IDP SAML Metadata and update authentication to save the changes.
Sharing File/Folder
Once the configuration is completed based on the above sections, it is now good to share a file/folder with Salesforce users using SSO.
To share and collaborate files with Salesforce users, check HERE for information on creating Shares. During the configuration, make sure you select the Login Profile that was created earlier based on the steps mentioned in this document.