AWS S3 file sharing with IAM Identity Center Users using SSO
NirvaShare has made it easier to share files from object storages like AWS S3 with customers who make use of external identity providers like IAM Identity Center using the concept of SSO. This document comprises of a stepwise procedure to integrate IAM identity center with NirvaShare to share and access files from AWS S3 object storage using SSO. Here, it is important to note that steps will remain more or less similar while integrating with other identity providers as well.
Prerequisites
As a prerequisite for AWS S3 file sharing with IAM identity center users, you should initially install NirvaShare and configure its storage. You can follow the procedure for installation provided in any one of the following documents.
The below document can aid you in configuring storage which can vary based on your choice of cloud storage.
Login Profile
In order to create a Login Profile in NirvaShare, you can make use of the following steps.
- Log in to the Admin console of NirvaShare as an administrator.
- Click on Login Profile from the left menu of the admin console.
- Click on CREATE button from the top right corner.
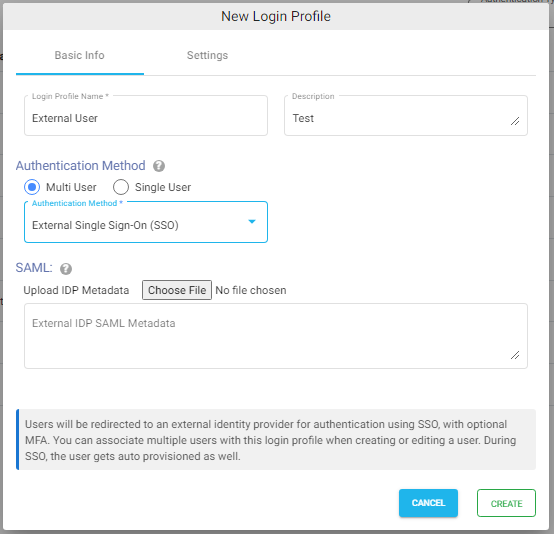
- Under the Basic Info tab, provide a name for the Login Profile Name and an optional description.
- For the Authentication, select External Single Sign On (SSO).
- For External IDP SAML Metadata, leave it blank for now.
Settings
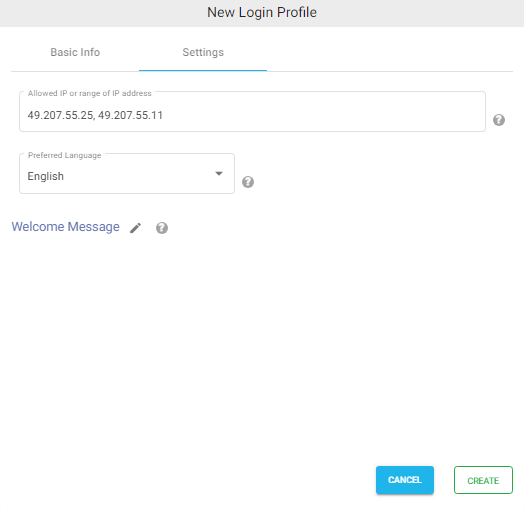
- Click on the Settings tab.
- (Optional) To restrict access to only certain white listed IP address or a range, please refer to Access Restriction with IP Address
- Choose the language in the Language field. By default, it is set to English.
- (Optional) While accessing this share, a welcome message can be displayed to the user. Please refer to Welcome Message for the Share
- Click on CREATE button to create the Login Profile.
SAML Metadata
For external identity provider integration, you will require SAML metadata from the login profile of NirvaShare. To obtain the SAML metadata for the newly created login profile, follow the below steps.
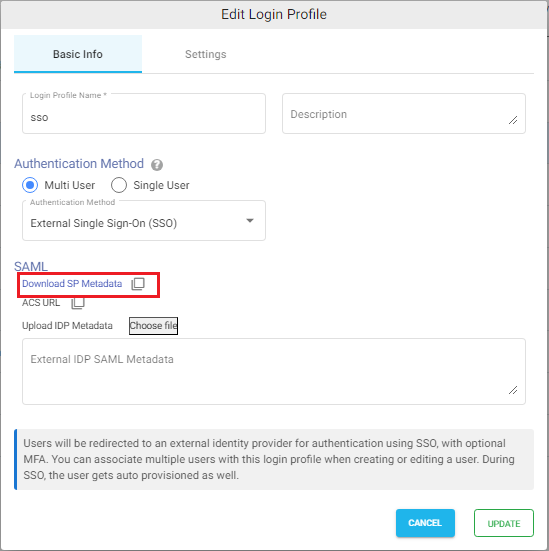
- Edit the newly created login profile.
- Click on Download SP Metadata, or copy the URL to the clipboard and open it in a browser tab.
- This will download the XML metadata file for NirvaShare.
- This metadata file will be required to configure the external identity provider. So please save this file locally for further reference.
Note – At a later stage, you will also require SAML metadata from identity provider and the content of the same has to be provided in the login profile.
IAM Identity Center Configuration
Login to AWS Console as an administrator.
- Go to IAM Identity Center service.
- Click on Users.
- Create a new user and make sure the Username is the same as the one we created in NirvaShare Admin Console at the beginning of the procedure.
- Click on Next to add user to Groups – optional.
- Click on Next to Review and Add user page and then Scroll down.
- Click on Add User.
- Click on Applications from the left menu.
- Click on Add New Application in the top menu.
- Click on Add a custom SAML 2.0 application.
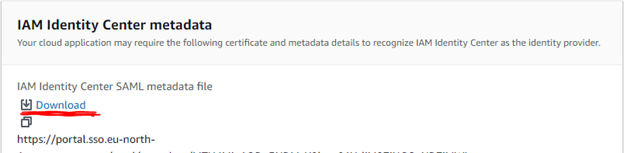
- From the IAM Identity Center metadata section, click on the download link to get the SSO metadata file.
- Save this file in your local storage with filename as aws-admin-metadata.xml.
Scroll down to Application metadata.
- In the Application metadata section, browse and upload the file admin-console-metadata.xml that was obtained earlier.
- Click on Submit Button To Configure.
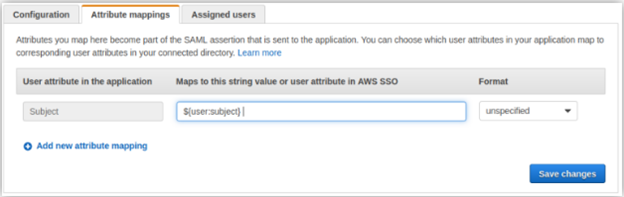
- Click on Attribute mappings tab and provide the value as ${user:subject} for Subject attribute.
- Click on Save Changes.
- This will create a new SAML Application.
- Click on the Assigned users tab and select the user that we created earlier and assign it.
- Please note that, you can also use a group and assign multiple users to it. For now, we will just take one user into consideration.
- Click on User and Select the user which you have Created.
- Click on Reset Password in the Top Right Corner.
- Select Generate a One-Time Password and Share the Password with the User and then Click on Reset Password.
Updating Login Profile with SAML Metadata
Make sure you have the SAML metadata XML file obtained from external IDP and follow the below steps to update SAML metadata in the Login Profile.
- Log in to Admin Console as an administrator.
- Click on Login Profiles from the left menu of the Admin Console.
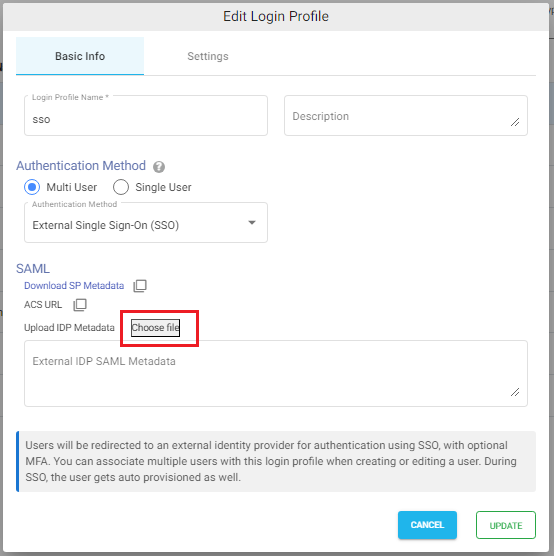
- Edit the existing Login Profile of type External Single Sign On (SSO)
- In the Upload IDP Metadata section click on the Choose File button and select the metadata file.
- Click on UPDATE.
Shares
After all these steps, we can finally use SSO with AWS. For this let us create a folder share and enable SSO. Refer to the document mentioned below to create a new share from Storage. But remember to select the login profile we created in the above section during the process of sharing. You can create one or more shares as well and assign the same login profile.
Verification
- In the admin console of NirvaShare, click on Login Profiles from the left menu.
- Right click on the login profile that we created and select Copy Shareable Link.
- Open the link in a new browser and this will redirect to AWS for SSO.
- Sign in with the Username which you have provided earlier and click on Next .
- Paste the Password which you copied from the AWS console.
- Click On Sign in.
- After Signing in to AWS portal, it will ask you to Register MFA Device which can be performed by selecting the Authenticator App. For this we should install the Free Google Authenticator App.
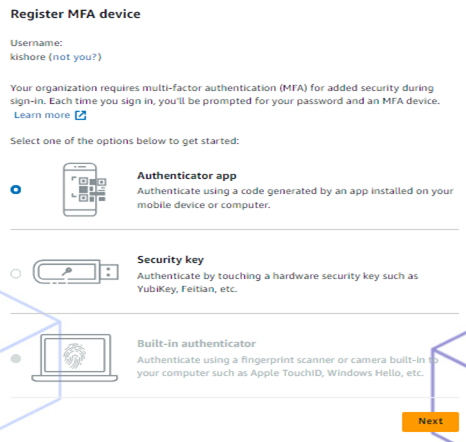
● Click on Next and Set up the Authenticator App.
● Use your Virtual MFA App to Scan the QR Code.
● Please enter the Code from your Authenticator App and Click on Assign MFA.
● Now, Click on Done. Once you complete the authentication, you can access Shares assigned to the login profile.