The Admin Console of NirvaShare comes with a default in-built user store to support various admin users. It is also possible to configure Admin Console with SSO feature to use external Identity providers like Okta , Microsoft Entra Id (Active Directory) etc. In this document, you can find the detailed procedure to configure Admin Console to use Okta, so that Okta users can easily login to Admin Console using SAML 2.0 SSO.
NirvaShare Configuration
The first step towards configuring NirvaShare Admin Console with SSO feature in order to use Okta involves configuring NirvaShare software, the steps for which are mentioned below.
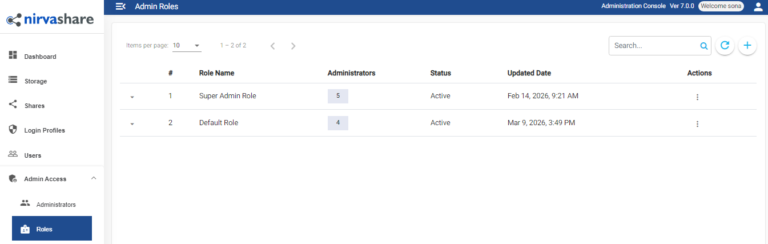
Login to NirvaShare Admin Console and click on Admin Access menu.
click on Roles in menu list.
Edit the existing Default Role.
Click on the Basic info tab, select the Full Access checkbox and click on UPDATE. At a later stage, you can change the access depending on the situation.
In the Linux terminal, SSH to the server where NirvaShare is installed and create a file with the below path and filename. Make sure you login as a Root user.
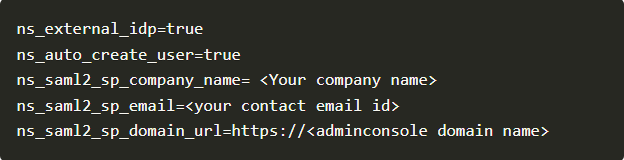
Now, add the following entries into the file.
Make sure you replace the attribute names with values pertaining to your company. ns_saml2_sp_company_name ns_saml2_sp_email ns_saml2_sp_domain_url
Save the config.properties.
Okta Configuration
To integrate NirvaShare with Okta, a SAML application has to be created in Okta for which it is essential to follow the steps mentioned below.
Sign-in to Okta console as an administrator.
Go to Applications at the left side of the menu and click on Applications in the Okta console.
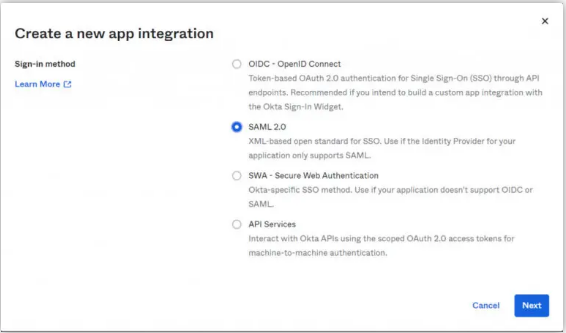
Click on Create App Integration.
In the pop-up page for the Sign-In method, select SAML 2.0.
Click on Next. Note – For more information, you can also refer to Okta Documentation.
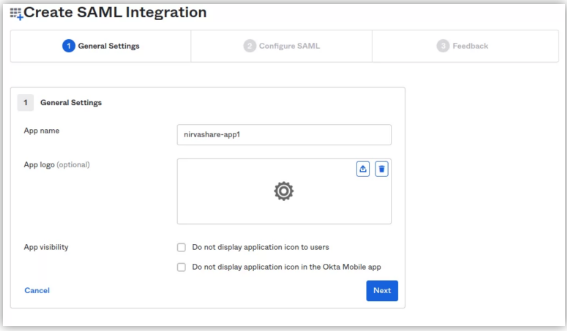
Give the app a name of your choice.
Select a logo (optional).
Click on Next.
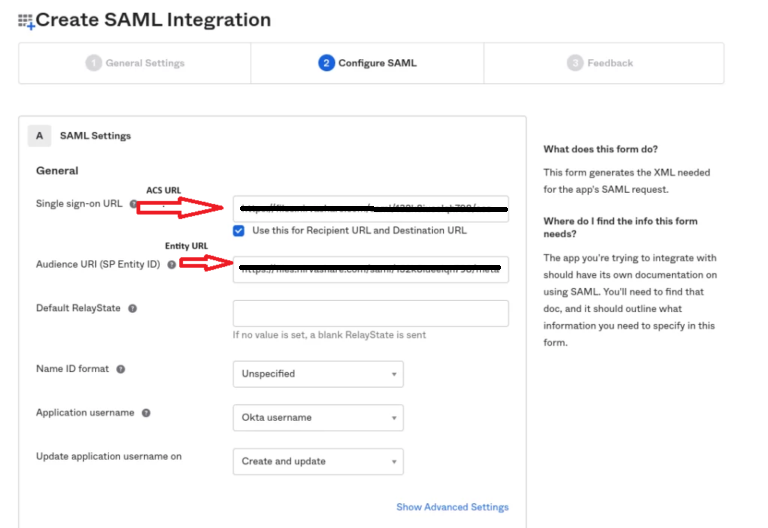
The next screen will ask for ACS and Entity Id URLs of NirvaShare.
Enter ACS URL in the Single Sign On URL field and select the option ‘Use this for Recipient URL and Destination URL’.
Enter the Entity Id URL into the Audience URL field, this URL contains the SAML metadata of NirvaShare.
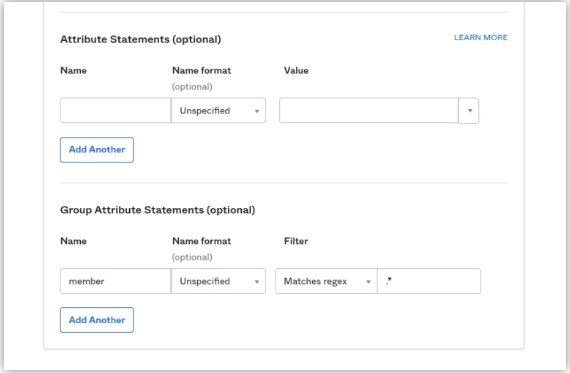
Leave the attribute statements (optional) field blank.
Scroll to Group attribute statements.
Type in member in the Name field, choose basic in the Name format drop down, Matches regex in the filter drop down and key in “ .* ” in the filter field.
Click on Next to move onto the feedback section.
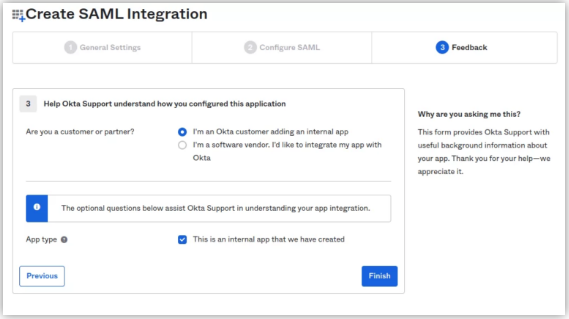
In the feedback section, select the option that says ” I’m an Okta customer adding an internal app ” and also check the option, ‘This is an internal app that we have created.’
Now click on Finish.
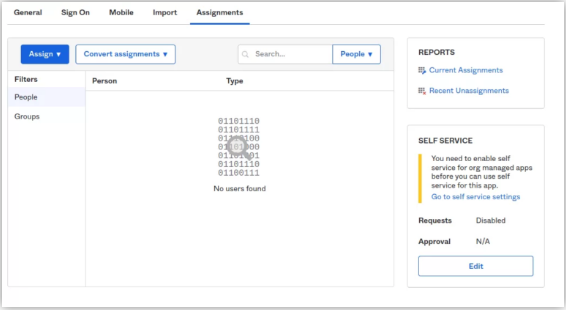
Click on Assignments tab in the next screen.
Assign one or more users to this app by clicking on Assign drop down.
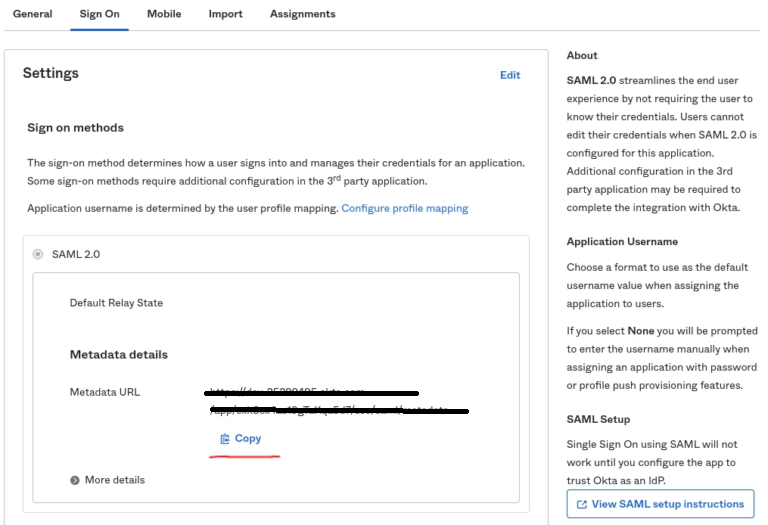
In the next step, click on the Sign On tab.
By Clicking on Copy, you will get the link to the Okta metadata URL.
Go to a new browser tab and open the Okta metadata URL.
Save the XML locally by right clicking on the URL.
The downloaded IDP metadata file will have to be updated.
SAML IDP Metadata
Once you have the SAML metadata file from Okta, please follow the below steps to configure the admin console.
Copy the SAML metadata file obtained from Okta to /var/nirvashare folder with filename as idp-metadata.xml as shown below.
Restart Admin Console Service using the below command.
Now open the Admin Console http://<your adminConsole domain>.This will redirect to Okta and perform SSO for authentication. Reach out to our support in case any help or assistance is needed.