While sharing a file/folder with users, access can be restricted to certain white listed IP or a range of IP addresses. In this guide, we will walk you through on how to set the IP address.
Login Profile
Access Restriction can be set in the Login Profile created in NirvaShare. When a user tries to access the Shares, the login will proceed only if the user originating client IP matches the one mentioned in Access Restriction. Below are the steps to set the IP Access Restriction.
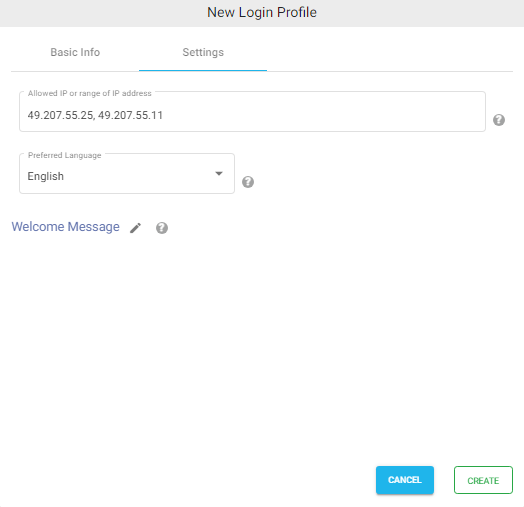
While creating or editing existing Login Profile, click on the Settings tab, set the IP address in the text box of Allowed IP or range of IP Address.
The valid format is the single IP address or can be IP range in IPv4 format.
For single IP, enter the IP address. Example 49.207.200.108
For an IP range, enter two IP range addresses. Example 49.207.200.100 – 49.207.200.120
For more than one IP, a range can be specified and each of them should be separated by a comma. Example 49.207.200.45, 49.105.100.12
Note – The IP Address Restriction can be added to all types of Login Profiles.