Share Files From Azure Blob Storage With Okta Users Using SSO
It is now easier to share files from Azure Blob storage with Okta users using NirvaShare, which is a secure file sharing and Access management software for object storage. This detailed guide will help you to integrate Okta identity provider with NirvaShare in order to share and manage access to Azure Blob storage.
Prerequisites
As a prerequisite for sharing files from Azure Blob storage with Okta users, you should install NirvaShare and configure its storage. You can follow the detailed procedure for installation provided in any one of the following documents
The below document can aid you in configuring storage.
Login Profile Creation
In order to enable SSO with Okta identity provider, the first step is to create a login profile in NirvaShare. The below mentioned steps will help you to create one.
- Login to Admin Console of NirvaShare.
- On the left menu of the admin console click on login profiles.
- Click on CREATE button located in the top right corner of the page.
- Provide a name for the title.
- For the Authentication, select External Single Sign On (SSO) and click on CREATE
- This will create a new Login Profile.

Note – For IP access restriction, refer to Access restriction with IP Address to restrict access to only certain white listed IP addresses or a range.
ACS and Entity ID
Further, while configuring Okta, you will require ACS and Entity Id URL, hence please make a note of these two URLs. You can get these two URLs by editing the newly created login profile.

Okta Configuration
To integrate NirvaShare with Okta, a SAML application has to be created in Okta and the steps mentioned below should be followed.
- Sign into Okta console as an administrator.
- Now go to Applications at the left side of the menu and click on Applications in the Okta console.
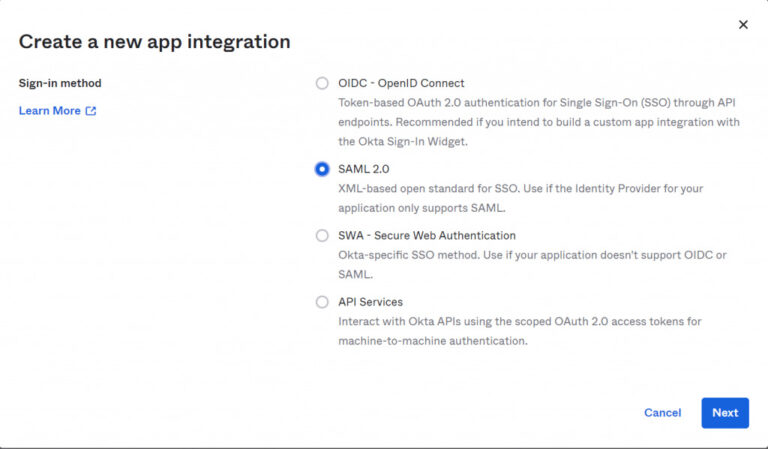
- Click on Create App Integration.
- In the pop-up page for Sign-In method, select SAML 2.0.
- Click on Next.
Note – For more information, you can also refer to Okta Documentation.
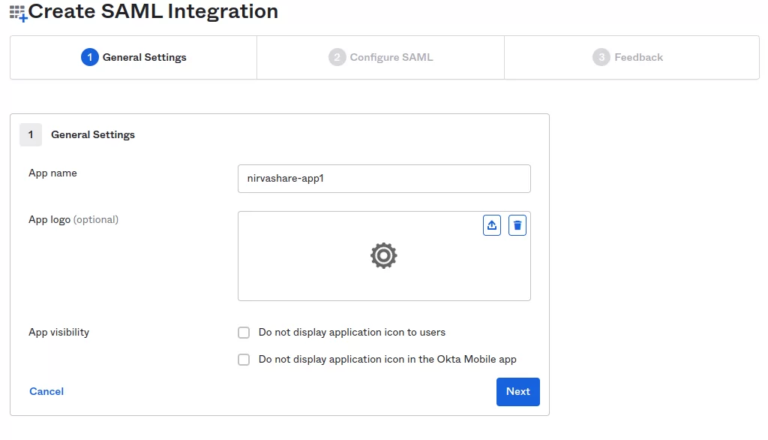
- Give the app a name of your choice.
- Select a logo (optional).
- Click on Next.
- The next screen will ask for ACS and Entity Id URLs of Nirvashare obtained in the previous section.
- Enter ACS URL in the Single Sign On URL field and select the option to ‘Use this for Recipient URL and Destination URL’.
- Enter the Entity Id URL into the Audience URL field, this URL contains the SAML metadata of the NirvaShare login profile.

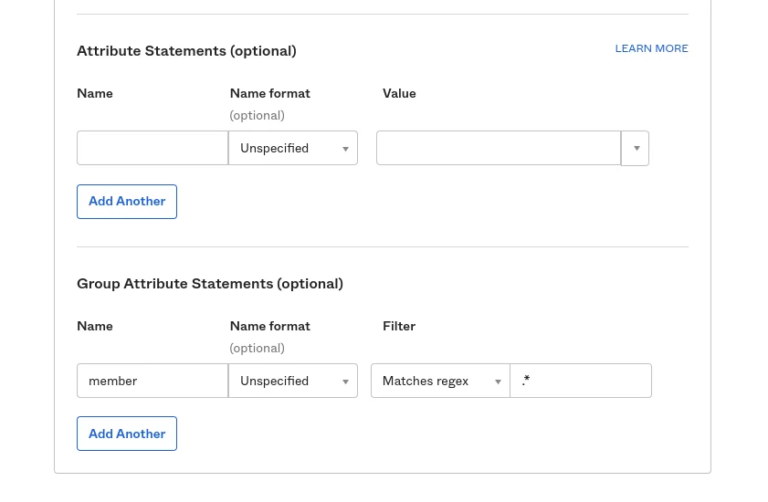
- Leave the attribute statements (optional) field blank.
- Scroll to Group attribute statements.
- Type in member in the Name field, choose basic in the Name format drop down, Matches regex in the filter drop down and key in “ .* ” in the filter field
- Click on Next to move onto the feedback section.
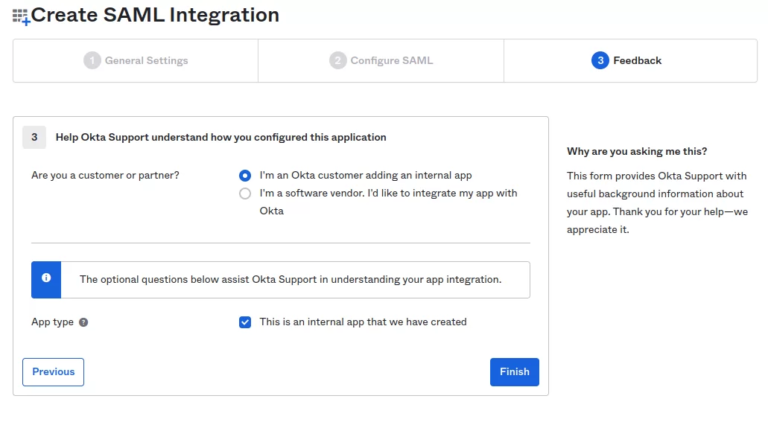
- In the feedback section, select the option that says ” I’m a Okta customer adding an internal app ” and also check the option “This is an internal app that we have created.”
- Now click on Finish.
- Click on the Assignment tab in the next screen.
- Assign one or more users to this app by clicking on Assign drop down.
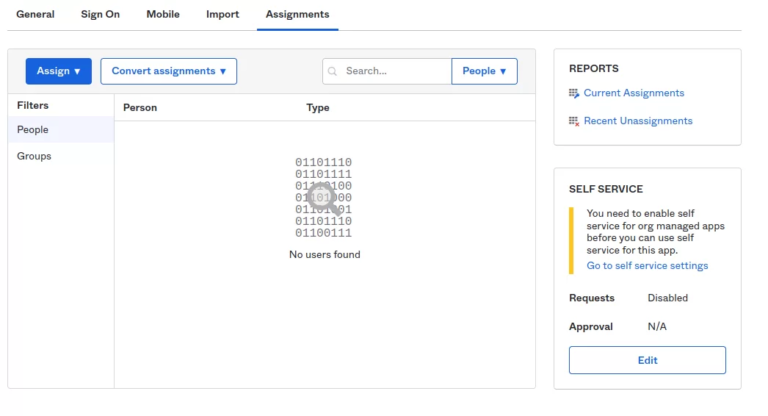
- In the next step,click on Sign On tab
- By clicking on Copy, will get the link of Okta metadata URL

- Go to a new browser tab and open the Okta metadata URL.
- Save the the XML file locally by right clicking on the URL.
- The downloaded external IDP metadata file should be updated in NirvaShare Login Profile.
Updating Login Profile with Okta SAML Metadata
The SAML metadata file obtained from the above process through Okta should be updated in the login profile in NirvaShare in order to share Azure Blob files. Here we have listed the steps to do it.
- Login as an administrator into admin console of NirvaShare.
- Go to the left menu of admin console and click on Login profiles.
- Edit the Login profile that we created earlier.
- In the Authentication section click on the browse button and select the metadata file for the External IDP SAML Metadata section.
- Click on Update.

Shares
After all these steps, we can finally use SSO with Okta. For this let us create a folder share and enable SSO. Refer to the document mentioned below to create a new share from Storage. But remember to select the login profile we created in the above section during the process of sharing. You can create one or more shares as well and assign the same login profile.
Verification
- In the admin console of NirvaShare, click on Login Profiles from left menu.
- Right click on the login profile that we created and select Copy Shareable Link.
- Open the link in a browser and this will redirect to Okta for SSO.
Once you complete the authentication, you can access Shares assigned to the login profile.
