Easily Share Files From MinIO Storage With Active Directory Users Using SSO
It is now made easier by Nirvashare to share files from MinIO Storage with Active Directory users using SSO. As we know, Active directory usage is quite persistent these days as it is useful in managing users and controlling access in a centralized manner irrespective of the size of the organization. NirvaShare provides ease of integration and exceptional access control with Active directory users which can also include Active directory groups.
Prerequisites
NirvaShare should be installed in your system environment manually using the below link in order to share MinIO files.
It is necessary to create a login profile in NirvaShare to enable SSO with external identity provider. Refer to the below procedure to create one.
Log in to Admin Console as an administrator.
Click on Login Profiles from the left menu of the Admin Console.
Click on CREATE button from the top right corner.
Provide a name for the title.
For Authentication, select External Single Sign On (SSO) and click on CREATE.
SAML Metadata
For external identity provider integration, you will require SAML metadata from the login profile of NirvaShare. To obtain the SAML metadata for the newly created login profile, follow the below steps.
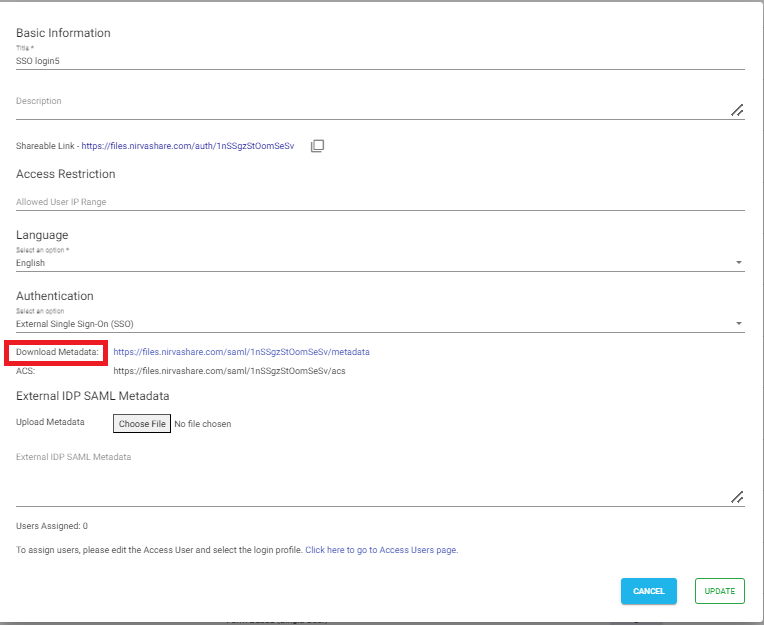
Edit the newly created login profile.
Click on the Download Metadata link.
This will download the XML metadata file for NirvaShare.
This metadata file will be required to configure the external identity provider. So you have to save this file locally for further reference.
Active Directory and Login Profile Configuration
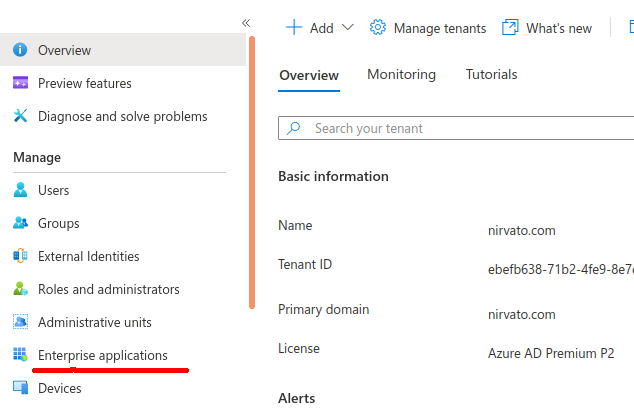
We have to create an application SSO access point, i.e enterprise application in Active Directory to integrate with NirvaShare and share files:
From the left menu list, click on Enterprise applications.
To know more, you can also visit the Microsoft site HERE.
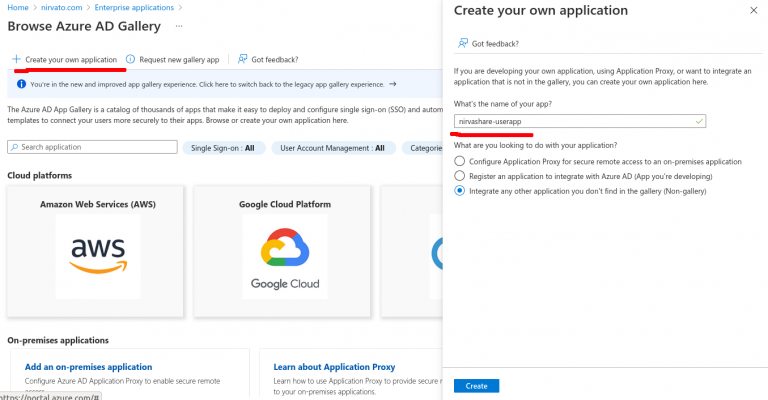
In the top menu, click on New application.
In the top menu, click on Create your own application.
Provide a name as NirvaShare-userapp and click on Create.
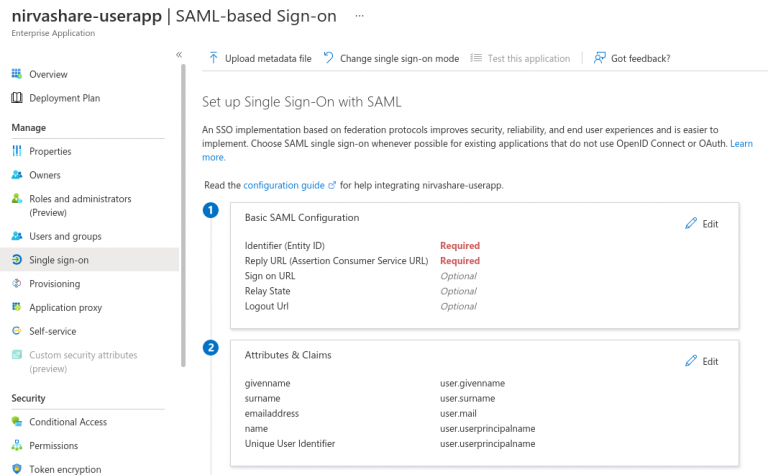
After selecting the newly created application, click on Single sign-on from the left menu tab.
Next we have to enable SAML for which we should click on SAML block on right hand side.
At this juncture, you will require SAML metadata file that was obtained from NirvaShare in the previous section.
For this, click on Upload metadata file
Select the NirvaShare SAML metadata file and upload.
Save it.
Now go to the next section Attributes & Claims and click on edit
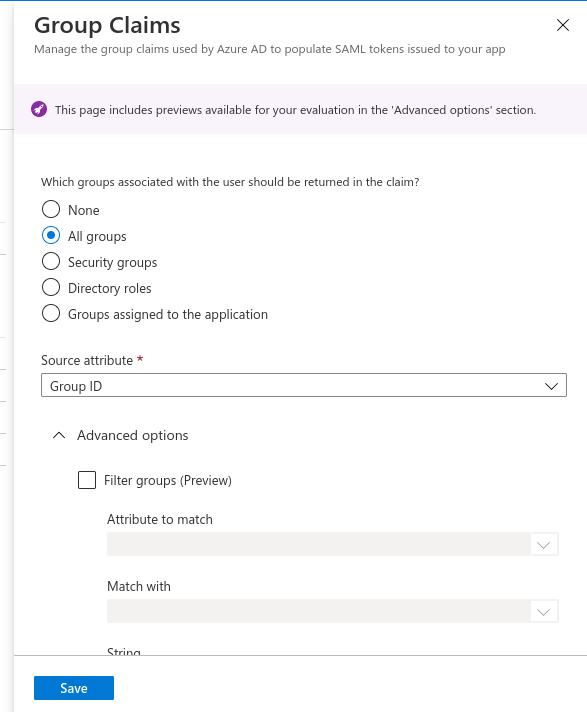
Click on Add a group claim from the top menu
Select All groups radio button and Source attribute as Group ID
Move down and expand Advanced options.
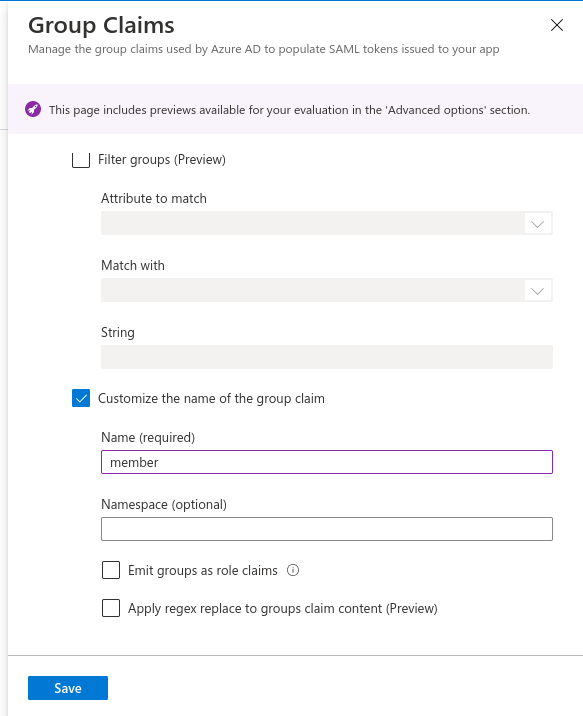
Click on checkbox to Customize the name of the group claim.
Provide the name as member.
Save it.
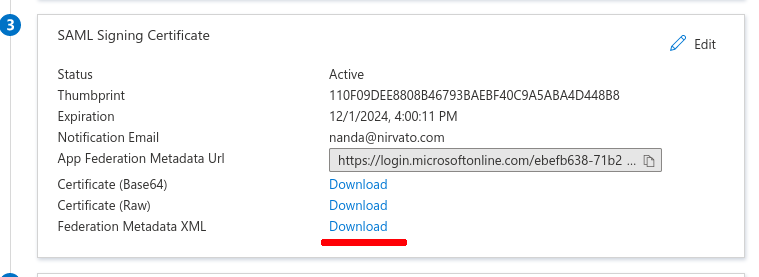
In the next step, we need to download Active Directory’s SAML metadata file. To do this,
Scroll down to the section SAML Signing Certificate.
Download the Federation Metadata XML file.
Save the file.
Updating SAML Metadata
Go back to NirvaShare Admin Console.
From the NirvaShare Admin Console, click on edit on the Login Profile that we created earlier.
Upload the Federation Metadata XML content obtained from Active Directory by clicking on Browse next to Upload Metadata under External IDP SAML metadata.
Save It.
With this, the required configuration to enable Active Directory Single Sign-On with NirvaShare is done. To test how to share MinIO files with Active Directory users using SSO, proceed with the next section to create Shares.
Shares
At this stage, we are good to use the SSO with MinIO. For this, let us create a folder Share and enable SSO. After that, refer to the below documentation to create new Share from the Storage. During the course of this Share configuration, please select the login profile that we created in the above section. You can also create one or more shares and assign the same login profile.