How to Share Files from Azure Blob Storage with External Users using Password Protection
Enterprise organizations often need to share files with external users from cloud storage platforms like Azure Blob, which can be challenging to manage securely. NirvaShare, a secure file sharing and access management software, simplifies this process. This document provides a detailed guide to help you securely share files using NirvaShare. The steps outlined here apply to both Azure Blob Storage and Azure File Shares.
Prerequisites
Before sharing files, ensure that NirvaShare is installed in your system environment. This can be done using one of the following two methods.
Storage Configuration
The next step involves configuring Azure Blob storage using Form-based authentication, which is required for file sharing. You can refer to the step-by-step procedure in the following document for detailed instructions.
Installation
Login to your Azure Portal and install NirvaShare directly from Azure Marketplace.
Azure access keys
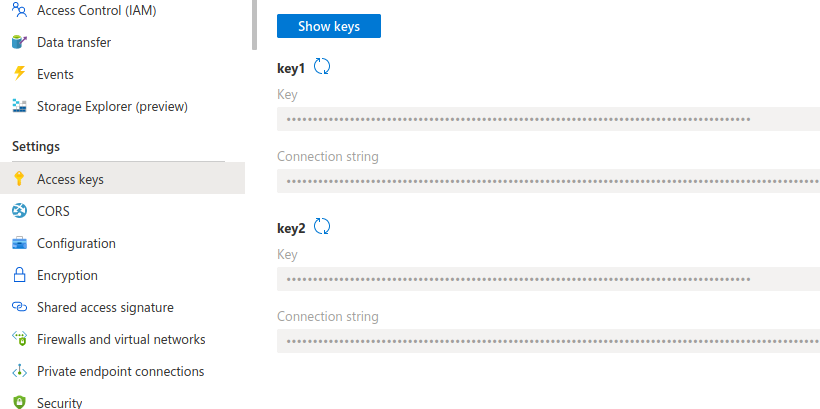
Before configuring NirvaShare, it is essential to obtain the access keys.
To generate access keys:
- Log in to the Azure Portal and select your storage account.
- Within the storage account, navigate to the Access Keys tab.
- Copy the connection string—this will be required when configuring the storage in the NirvaShare Admin Console.

Configuration
Once the installation is completed and the connection string is made available, the next step is to configure NirvaShare to connect to your Azure Blob Storage and share files or folders using Form-based authentication.
Assuming, deployment was successful, please open the Admin Console URL -> http://(your ip):8080

Log in to the Admin Console using the default credentials: admin/admin. It is strongly recommended to change the password after your first login. To do so, refer to the Change Password documentation.
You can also create additional administrative users under the Admin Access tab. Ensure that new users are granted full access permissions if they have to manage or reset other admin accounts. For instructions on resetting a forgotten password, refer to the Password Reset documentation.
Note: The default built-in user store does not support password reset functionality for the Admin Console. For production environments, it is recommended to integrate NirvaShare with your organization’s identity provider—such as Keycloak, Active Directory, etc.—to enable better password policies and single sign-on (SSO) capabilities.
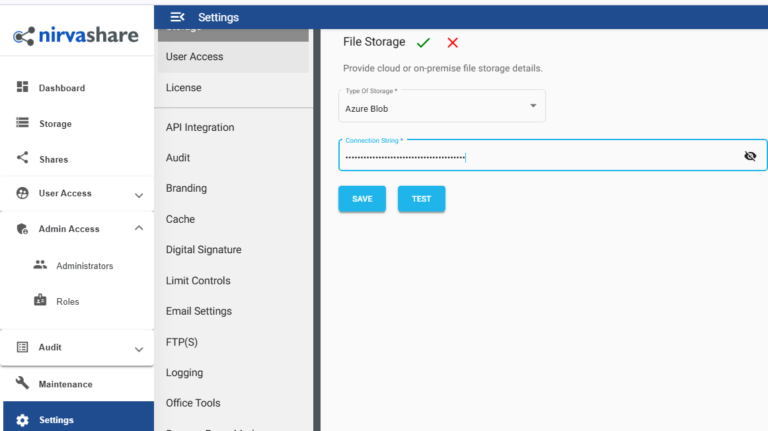
After logging into the application:
- Click on Settings from the left menu tab.
- Click Edit File Storage, select Azure Blob as the storage type, and enter your storage connection string.
- Click Save.
- In the next section, click Edit User Application URL, enter the user application URL in the format
http://<instance-ip>:8081, and save the changes.
Note: For production use, it is recommended to use a proper domain name secured with HTTPS.
Additional settings such as email configuration, audit logs, etc., are optional at this stage and can be configured later. For more details, refer to the Settings documentation.

File Sharing with Form based Authentication
To Share a folder with form based Authentication, please refer to Setup Form based Authentication.
