Share Files from Google Storage with Entra ID (Active Directory) users using SSO
It is essential to share files from Google Cloud Storage with Microsoft Entra Id (Active Directory) Users as most organizations invariably use Entra ID. With NirvaShare it is very simple to enable this integration and allow administrators to share large files with users using SSO from Entra ID.
Prerequisites
Before you begin to share files from Google storage you should ensure that NirvaShare is installed in your system environment manually.
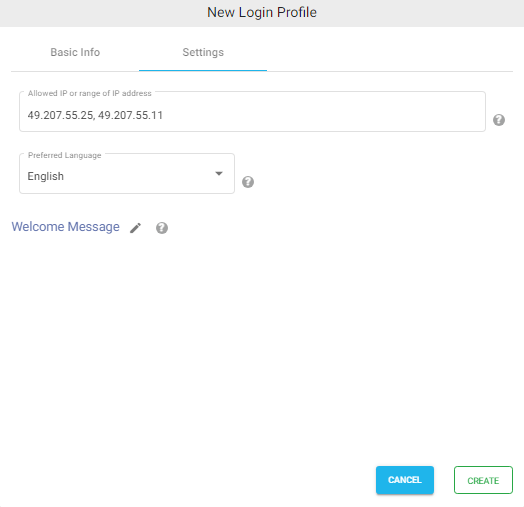
Choose the language in the Language field. By default, it is set to English.
(Optional) While accessing this share, a welcome message can be displayed to the user. Please refer to Welcome Message for the Share
Click on CREATE button to create the Login Profile.
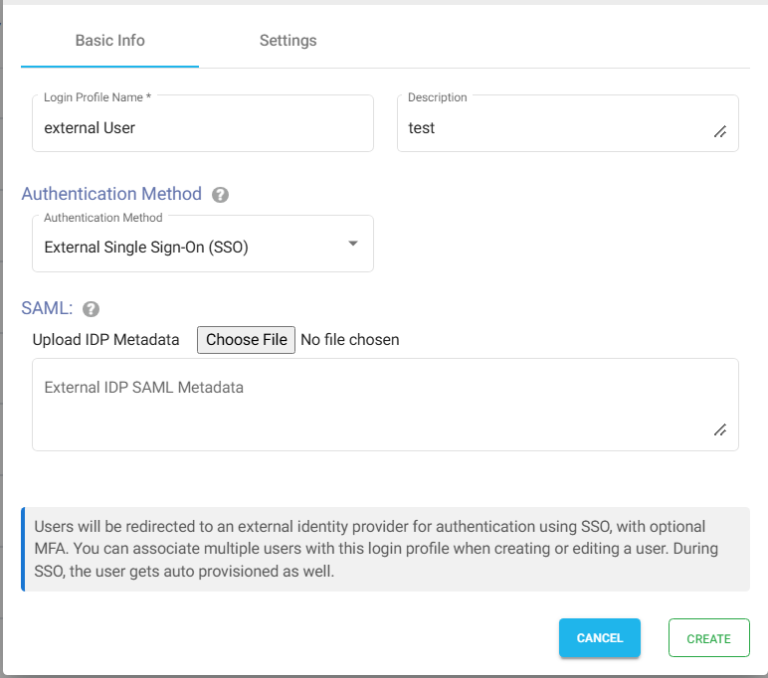
SAML Metadata
For external identity provider integration, you will require SAML metadata from the login profile of NirvaShare. To obtain the SAML metadata for the newly created login profile, follow the below steps.
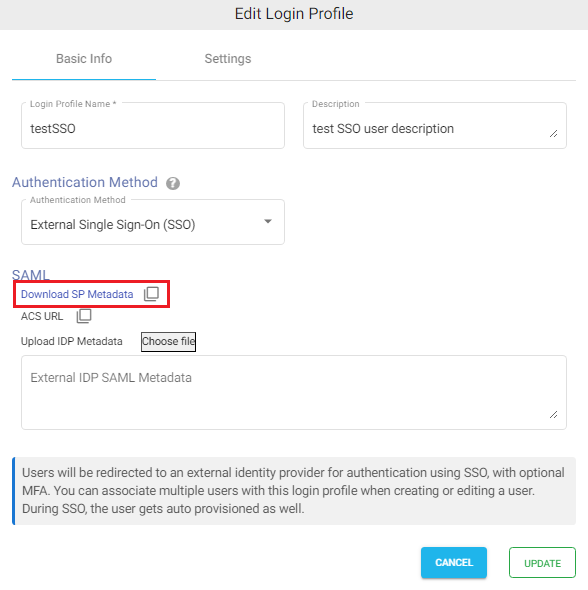
Edit the newly created login profile.
Click on Download SP Metadata, or copy the URL to the clipboard and open it in a browser tab.
This will download the XML metadata file for NirvaShare.
This metadata file will be required to configure the external identity provider. So please save this file locally for further reference.
Note – At a later stage, you will also require SAML metadata from the identity provider and content of the same has to be pasted in the textbox and saved in the login profile.
Entra ID and Login Profile Configuration
We need to create an application SSO access point, i.e., enterprise application in Entra ID to integrate with NirvaShare:
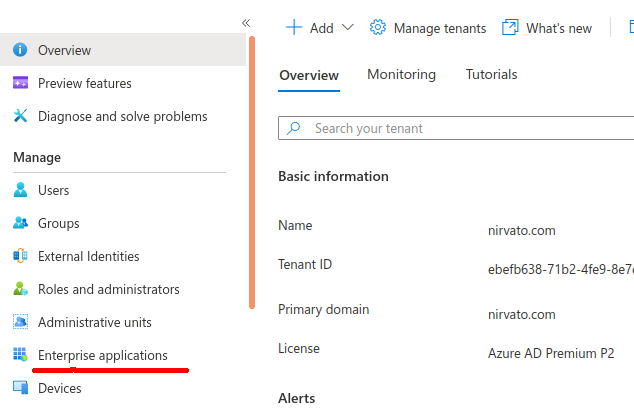
From the left menu list, click on Enterprise applications.
To know more, you can also visit Microsoft site HERE.
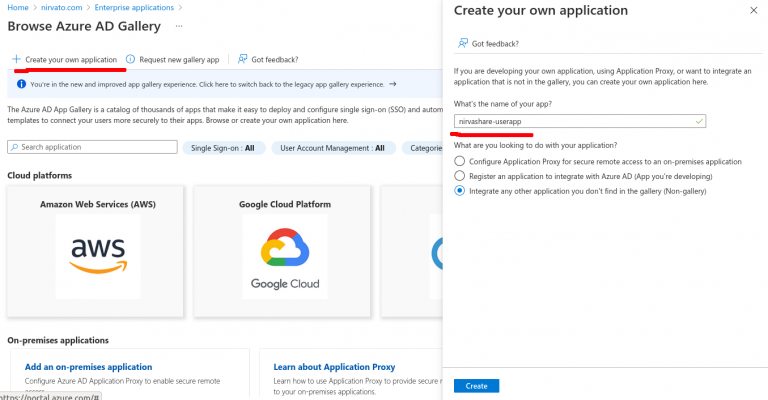
In the top menu, click on New application.
In the top menu, click on Create your own application.
Provide a name as NirvaShare-userapp and click on Create.
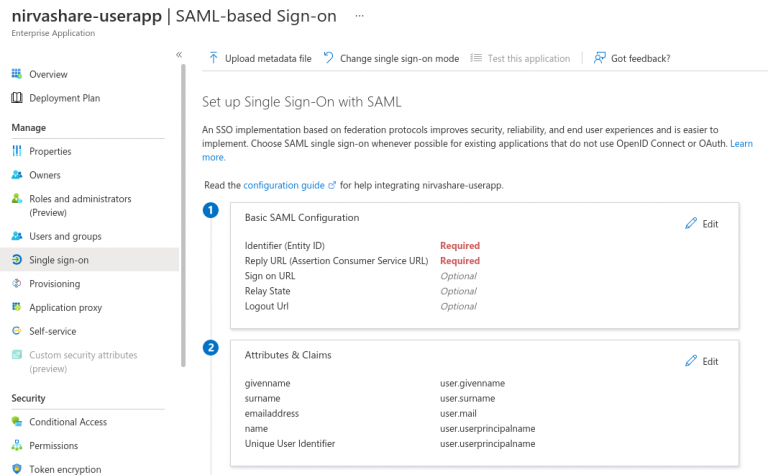
Once the newly created application is selected, click on Single sign-on from the left menu tab.
We need to enable SAML, hence click on SAML block on the right hand side.
At this instant, you will require SAML metadata file that was obtained from NirvaShare in the previous section.
Click on Upload metadata file.
Select the NirvaShare SAML metadata file and upload.
Save it.
Go to the section Attributes & Claims and click on edit.
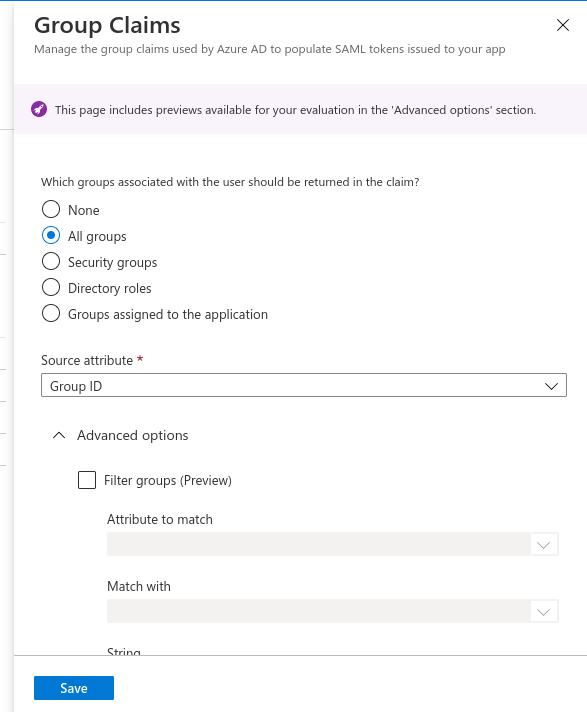
Click on Add a group claim from the top menu.
Select the All groups radio button and the Source attribute as Group ID.
Scroll down and expand Advanced options.
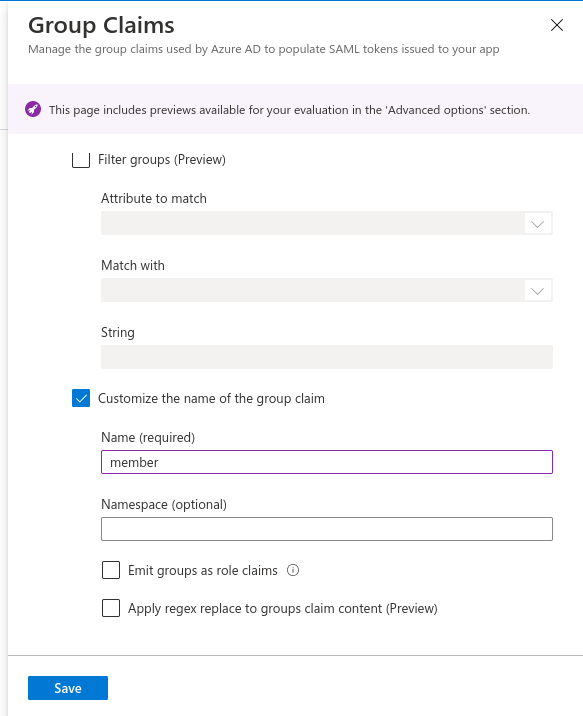
Enable checkbox to Customize the name of the group claim.
Provide the name as member.
Save it.
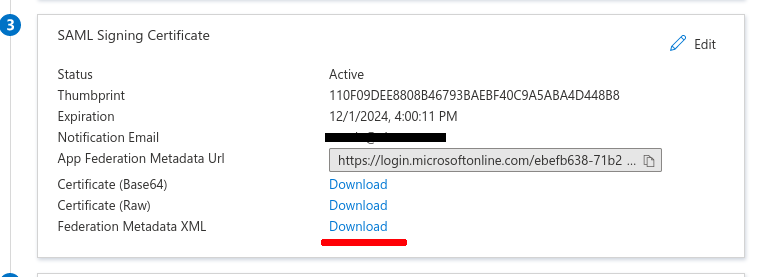
In the next step, we need to download Entra ID’s SAML metadata file.
Scroll down to the section SAML Signing Certificate.
Download the Federation Metadata XML file.
Save the file.
Updating Login Profile with SAML Metadata
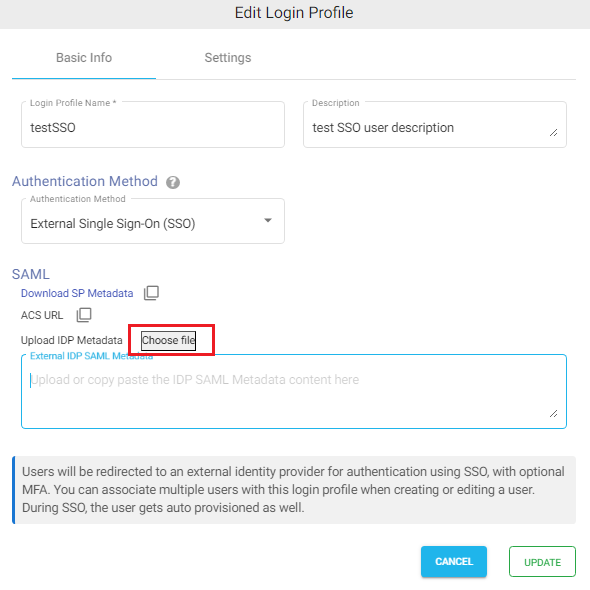
Make sure you have the SAML metadata XML file obtained from external IDP and follow the below steps to update SAML metadata in the Login Profile.
Log in to Admin Console as an administrator.
Click on Login Profiles from the left menu of the Admin Console.
Edit the existing Login Profile of type External Single Sign On (SSO)
In the UploadIDP Metadata section click on the Choose File button and select the metadata file.
Click on UPDATE.
Shares
At this stage, we are good to use the SSO with Google Storage. Now we can create a folder Share to share Google storage files with Entra ID Users using SSO. Refer to the below documentation to create a new Share from the Storage. During the Share configuration, ensure that you select the login profile that we created in the above section. You can also create one or more shares and assign the same login profile.