NirvaShare simplifies secure file sharing from object storage services like AWS S3, especially when working with users from external identity providers such as Okta. In addition to Okta, NirvaShare also supports a wide range of identity providers including Entra ID, Google Workspace, Keycloak, and more.
In this step-by-step guide, we have outlined the process of integrating Okta as an identity provider with NirvaShare to enable secure access to files stored in S3. It’s important to note that the steps outlined here are generally applicable to other identity providers as well, with only minor adjustments.
Prerequisites
As a prerequisite for S3 file sharing with Okta users, you should install Nirvashare and configure its storage. You can follow the procedure for installation provided in any one of the following documents.
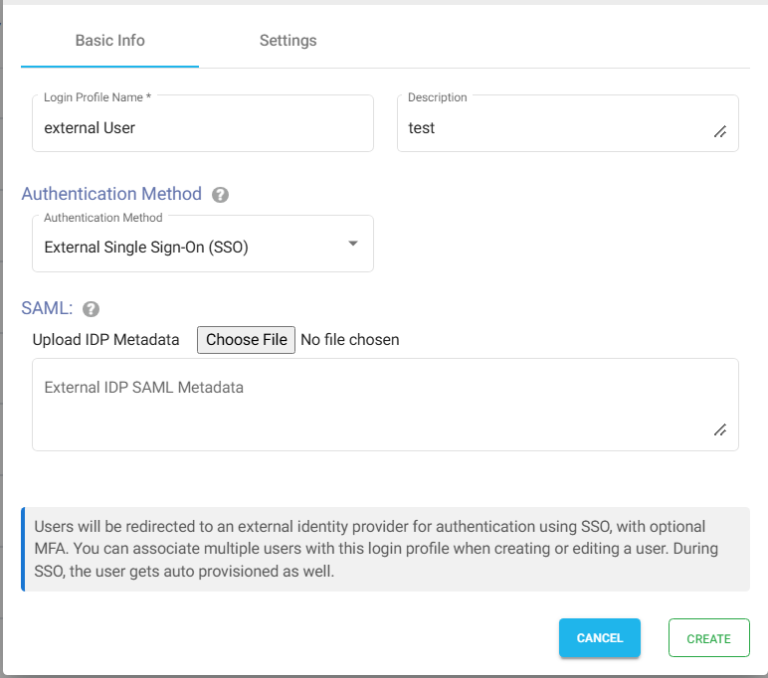
In most cases, while configuring the identity provider, you can directly upload NirvaShare SAML metadata file that we obtained in previous section, but however with certain identity providers, instead of metadata file, you may require ACS and metadata URL In those cases, use the ACS URL mentioned in the login profile. For Entity ID, use the Metadata URL.
Okta Configuration
To integrate NirvaShare with Okta, a SAML application has to be created in Okta and the steps mentioned below should be followed
Sign into Okta console as an administrator.
Now go to Applications at the left side of the menu and click on Applications in the Okta console.
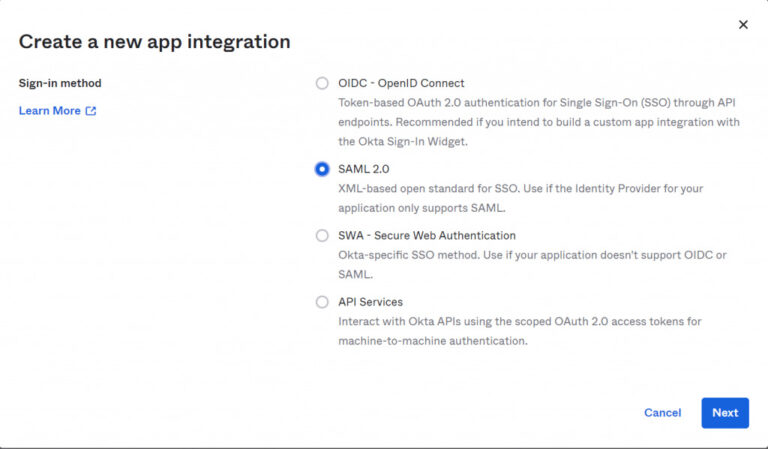
Click on Create App Integration.
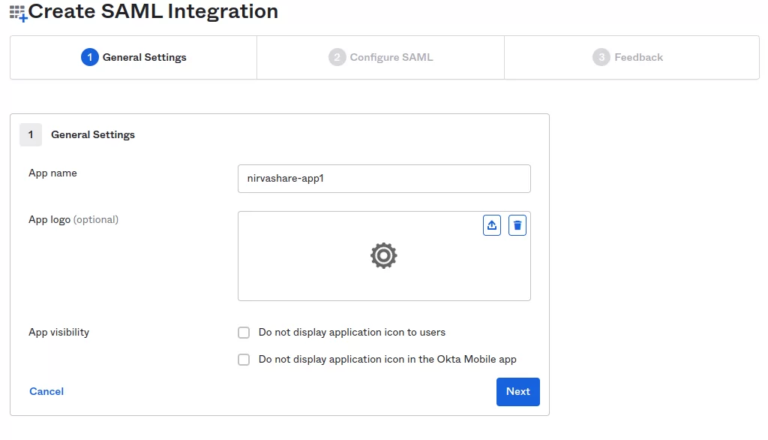
In the pop-up page for Sign-In method, select SAML 2.0.
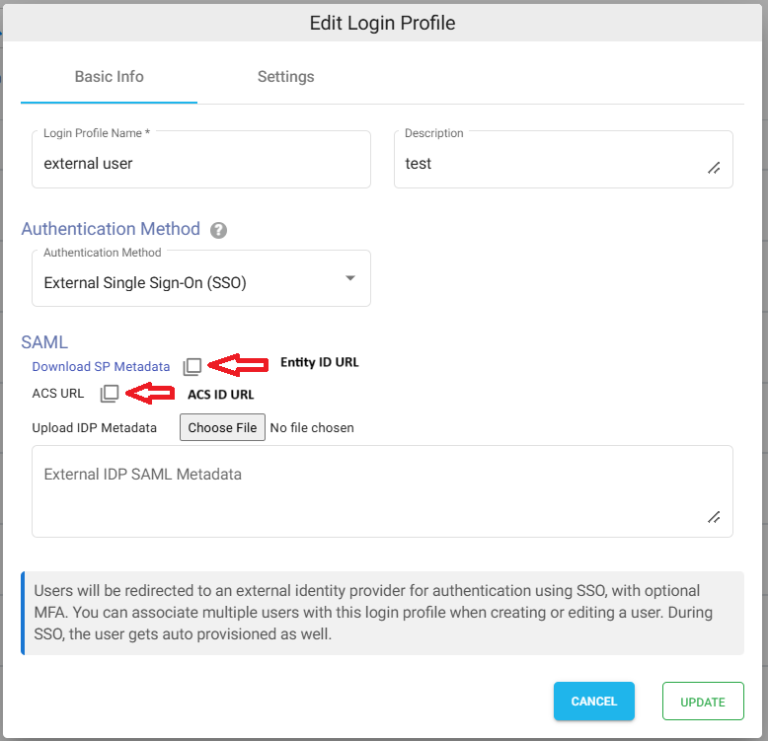
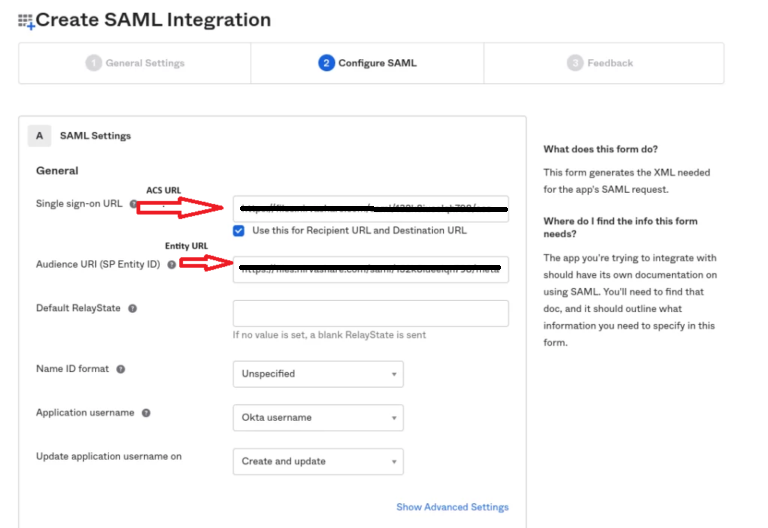
The next screen will ask for ACS and Entity Id URLs of Nirvashare obtained in the previous section.
Enter ACS URL in the Single Sign-On URL field and select the option to ‘Use this for Recipient URL and Destination URL’.
Enter the Entity Id URL into the Audience URL field, this URL contains the SAML metadata of the NirvaShare login profile.
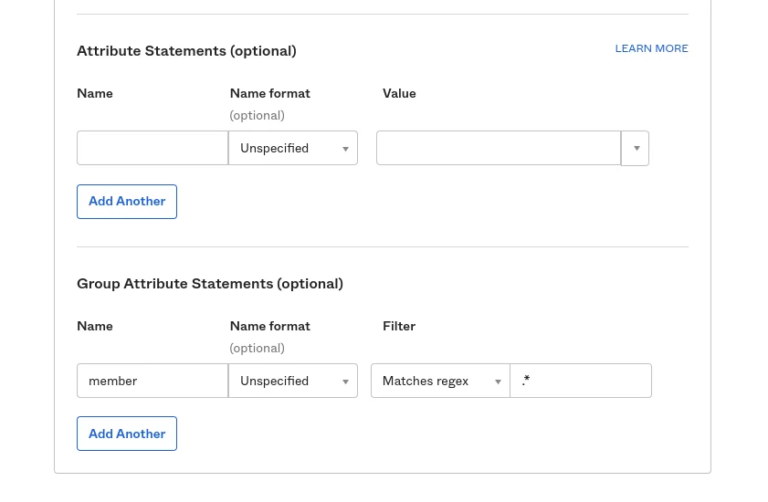
Leave the attribute statements (optional) field blank.
Scroll to Group attribute statements.
Type in member in the Name field, choose basic in the Name format drop down, Matches regex in the filter drop down and key in“ .* ”in the filter field.
Click on Next to move onto the feedback section.
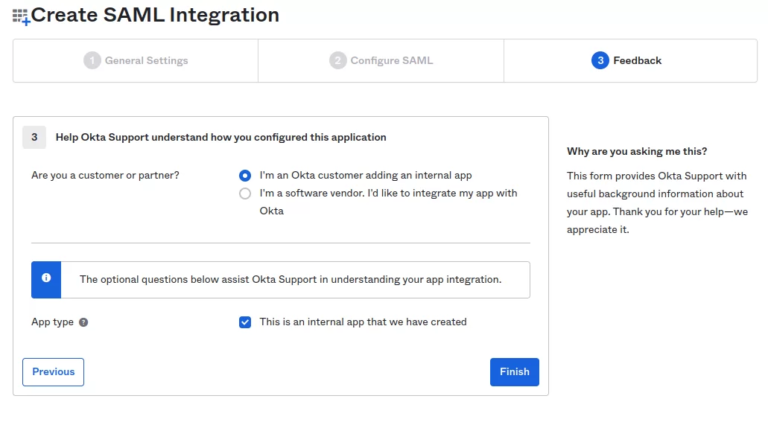
In the feedback section, select the option that says ” I’m a Okta customer adding an internal app ” and also check the box This is an internal app that we have created.
Now click on Finish.
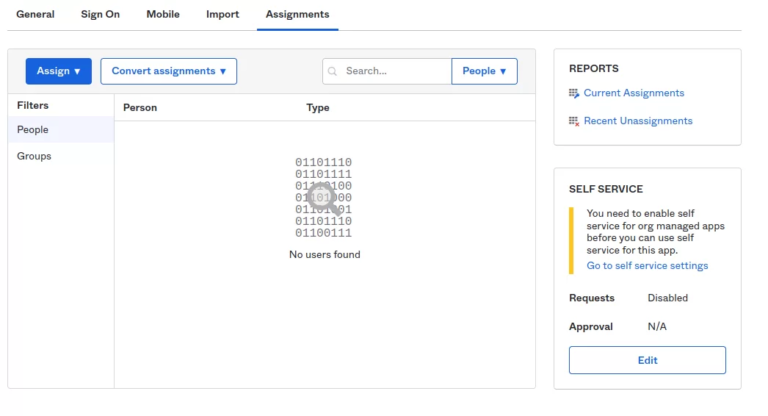
Click on the Assignment tab in the next screen.
Assign one or more users to this app by clicking on Assign drop down.
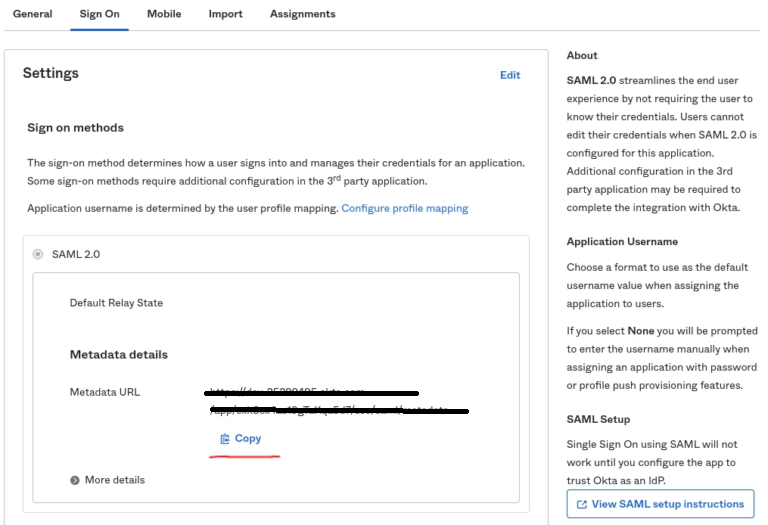
In the next step,click on Sign On tab.
Clicking on Copy, will get the link of Okta metadata URL.
Go to a new browser tab and open the Okta metadata URL.
Save the XML locally by right clicking on the URL.
The downloaded external IDP metadata file will have to be updated in NirvaShare Login Profile.
Updating Login Profile with SAML Metadata
Make sure you have the SAML metadata XML file obtained from external IDP and follow the below steps to update SAML metadata in the Login Profile.
Log in to Admin Console as an administrator.
Click on Login Profiles from the left menu of the Admin Console.
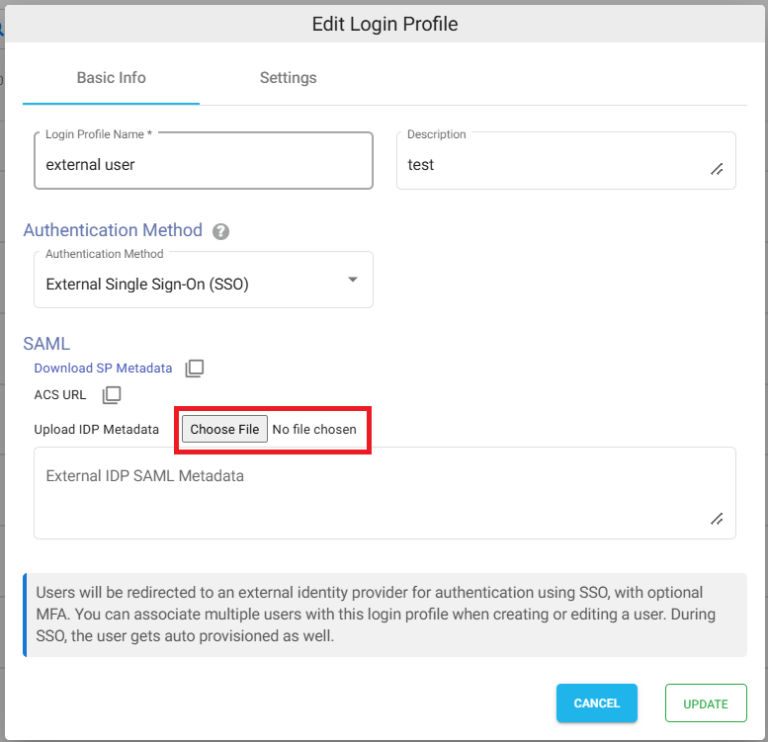
Edit the existing Login Profile of type External Single Sign On (SSO)
In the UploadIDP Metadata section click on the Choose File button and select the metadata file.
Click on UPDATE.
Shares
After completing the Okta integration steps, you can now use Single Sign-On (SSO) with Okta to securely access shared files.
To proceed:
Create a Folder Share – Follow the steps in the document Creating Share to create a new share from your configured object storage.
Assign the Login Profile – During the share creation process, make sure to select the Login Profile that was configured earlier for Okta SSO.
Multiple Shares Support – You can create one or more shares, all linked to the same Okta-based login profile, allowing consistent SSO access across different folders.
Verification
In the admin console of NirvaShare, click on Login Profiles from left menu.
Right click on the login profile that we created and select Copy Shareable Link.
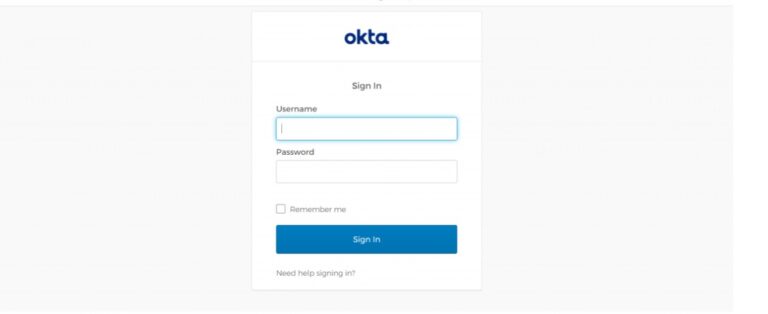
Open the link in a browser and this will redirect to Okta for SSO.
Once you complete the authentication, you can access Shares assigned to the login profile.