SSO for Admin Console using Azure Entra ID
Admin Console of NirvaShare comes with default in-built user store to support multiple admin users. It is also possible to configure Admin Console to use external Identity providers like IAM Identity Center, Entra ID, etc. In this document, we will configure Admin Console to use Microsoft Entra Id (Active Directory), so that users from Entra ID will be able to login to Admin Console using SAML 2.0 SSO.
Prerequisites
As prerequisites you will need to have:
- NirvaShare, installed in your environment either manually or from MarketPlace.
- Make sure the proper domain name and SSL certificate is configured for Admin Console.
- You will require access to your Entra ID as a console administrator.
Configuration
We need to create an enterprise application in Entra ID to integrate with NirvaShare:
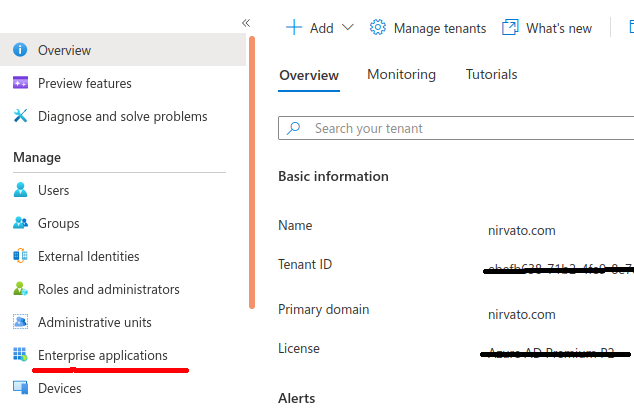
- Sign in to Azure Portal https://portal.azure.com.
- Open Entra ID service.
- From the left menu list, click on Enterprise applications.
To know more, you can also visit Microsoft site HERE.
- On the top menu, click on New application.
- On the top menu, click on Create your own application.
- Provide a name as nirvashare-adminConsole and click on Create.

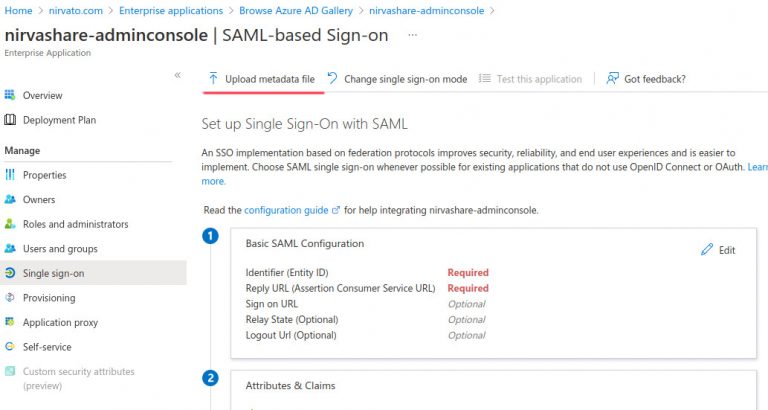
- Once the newly created application is selected, click on Single sign-on from the left menu tab.
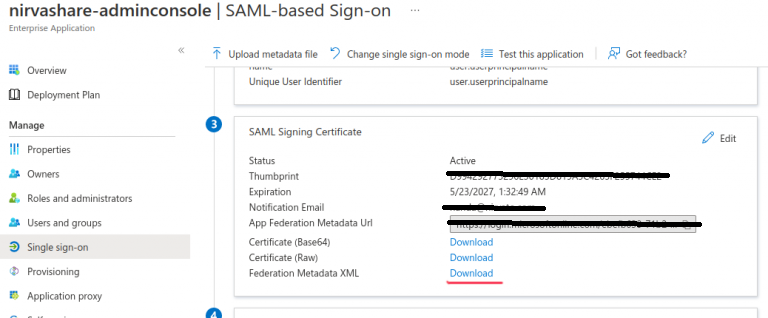
- We need to enable SAML, hence click on SAML block on the right-hand side and scroll down.
- Download the Federation Metadata XML file from SAML Signing Certificate section. Save it into your local file system as idp-metadata.xml.
- Above file is the SAML metadata file for Azure Entra ID and same will be required while configuring NirvaShare Admin Console.
- Click on Users and groups from left tab and make sure to assign few users to this application.
- Please note that, you can also use a group and assign multiple users to it, for now we will deal with users.
NirvaShare Configuration
Now that you have the SAML metadata file of Azure Entra ID, please refer to the below documentation to configure SSO for Admin Console of NirvaShare.
- SSO Configuration for Admin Console
- Based on the above documentation, you can obtain SAML metadata file of NirvaShare.
- In the Azure SAML Single sign-on page, upload the SAML metadata file of NirvaShare.
At this juncture, you will require SAML metadata obtained from the earlier steps from Admin Console.
- Click on Upload metadata file selects the admin-console-metatdata.xml from your local system.
- Save it.
Now open Admin Console https://<your adminConsole domain> this will redirect to Azure Entra ID and perform SSO for authentication. Reach out to our support in case any help or assistance is needed.