SSL and Load balancer on AWS for NirvaShare
For production deployments, it is essential to configure an SSL certificate to ensure secure communication. When using an AWS Load Balancer, you not only gain high availability and failover support, but you can also easily enable SSL using AWS’s built-in certificate management—provided you own a valid domain name.
In this section, we will walk through the steps to configure an SSL certificate for both the Admin Console and the User Application, along with setting up a Load Balancer for NirvaShare.
Prerequisites
As prerequisites you will need to have:
- NirvaShare installed in EC2. You can also directly install from AWS Marketplace.
- Configure the Storage and User Application URL. For details check HERE.
- You will require access to your AWS console as administrator.
- Make sure you own the domain name for which SSL certificate will be created.
Process
For NirvaShare, two separate domain names are required—one for the Admin Console and another for the User-facing Application. You can use subdomains under your main domain, such as:
- admin.your-domain.com
- share.your-domain.com
SSL Certificate
- Login to AWS Console as Administrator.
- Open the service “Certificate Manager”.
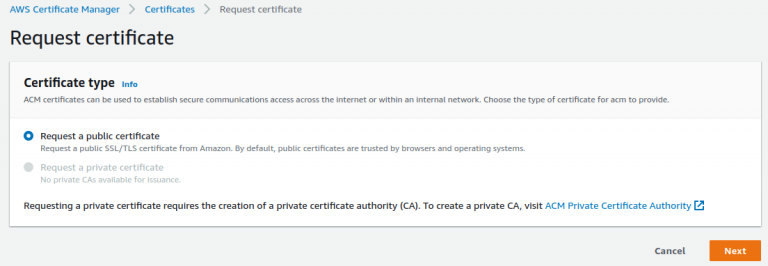
- Click on the “Request” button to register your domain for which a certificate has to be generated.
- You will require two certificates one for Admin Console and the other for User Application.
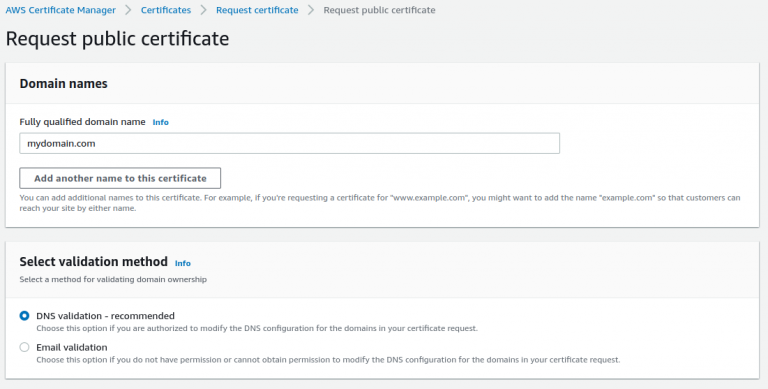
- Select the “Request a public certificate” radio button.
- Provide the domain name to let us create a certificate for Admin Console. You can provide something like admin.yourdomain.com
- For the validation method, select “Email Validation” as this is easier to proceed further. Otherwise, the DNS method can also be selected depending on your choice.
- In case of the Email method, the domain owner will get an email to approve this.
- Click on Request and make sure the domain owner approves the same email/DNS method for AWS to consider you as authorized person to use this domain for certificate creation.
- Once approved, AWS will create a certificate for the admin console domain.
- You have to create one more certificate in a similar way for User application for a domain like share.yourdomain.com.
Target Groups
Before configuring the Load Balancer, you need to create target groups, which act as collections of EC2 instances to route traffic to.
Navigate to Target Groups
- In the AWS Console, go to the EC2 service.
- From the left-hand menu (scroll to the bottom), click on Target Groups.
Create Two Target Groups
You will need to create two target groups:
- One for the Admin Console
- One for the User Application
Create Target Group for Admin Console
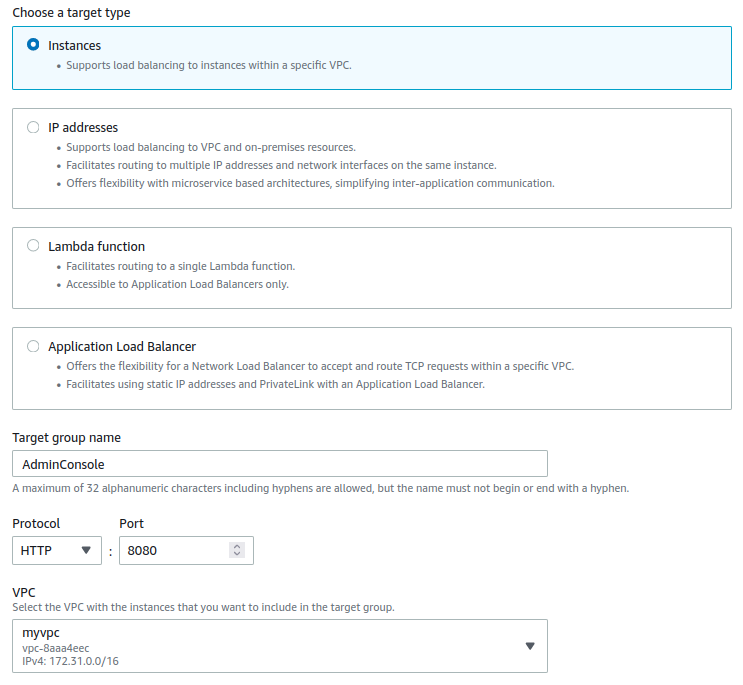
- Click Create Target Group.
- For Target type, select Instances.
- Set the Target group name to
AdminConsole. - Set the Port to
8080. - Choose the VPC in which your EC2 instance is running (this must be the same VPC where NirvaShare is installed).
- Click on Next.
- From the available list of instances, select the EC2 instance where NirvaShare is installed and click on “Include as pending below” with port as 8080.
- Click on Create Target Group.
- Repeat above steps from 4 to 9 and this time for User Application. Provide the name as “UserApplication” and port as 8081.
- Finally, you should have two target groups created.
Load Balancer Configuration
- Here we require two load balancers one for Admin Console and another for User Application.
- Go to EC2 Service and click on Load Balancers from the left bottom menu.
- Click on Create Load Balancer and select type as “Application Load Balancer”.
- Provide a name as “AdminConsole”
- For scheme, select “internet-facing”
- Address type as ipv4
- For VPC, select the one that is used by the EC2 instance where NirvaShare is installed.
- Select preferred availability zones.
- You can use the default security group or select one that is appropriate for your environment.
- For the listener, select the protocol as HTTPS with port 443 and target group as AdminConsole.
- For SSL certificate select “From ACM” and domain name as admin.yourdomain.com
- This will take a couple of minutes to provision.
- Repeat the same to create one another load balancer for user application by following steps from 3 to 11 for User application.
- Also make sure, you allow in-bound ports 8080 and 8081 in the security group.
Final Verification
- Copy the DNS name of the admin console from load balancer and open it in browser using HTTPS.
- This will load the NirvaShare admin console application using HTTPS but with an invalid certificate. The reason being, the certificate is not valid for load balancer DNS name.
- Now you can open the same with proper admin console domain name that was properly registered with Route 53.
In case if you need any help or assistance, please reach out to our support.