SSO for Admin Console using IAM Identity Center
The Admin Console of NirvaShare includes a default built-in user store that supports multiple admin users. Additionally, it is possible to configure the Admin Console to use external identity providers such as IAM Identity Center, Entra ID, and others.
In this document, we will walk through the process of configuring the Admin Console to use IAM Identity Center. This setup enables users from IAM Identity Center to log in to the Admin Console using SAML 2.0 authentication.
Prerequisites
Before proceeding, ensure the following requirements are met:
NirvaShare Installation:
NirvaShare should be installed either on the cloud or on-premises. You can also install it directly from the AWS Marketplace.Storage and User Application URL Configuration:
Ensure the storage and User Application URL are properly configured. For more details, refer to the documentation HERE.Domain and SSL Setup:
A valid domain name and SSL certificate must be configured for the Admin Console.IAM Identity Center Access:
You must have administrator access to your IAM Identity Center console.
Configuration
- Log in to the Admin Console –Navigate to the Admin Console and log in with your existing admin credentials.
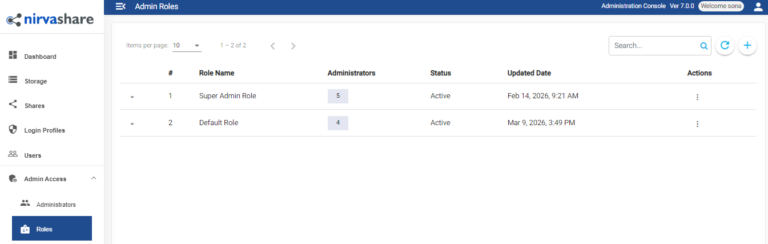
- Create a Delegated Admin User
- Go to the Admin Access menu.
- click on Administrators in menu list.
- Click on CREATE button to create the New User.
- Set the role to Super Admin.
- Enter a unique username. This username must match the corresponding user in IAM Identity Center (you can create this user in IAM Identity Center later if it doesn’t already exist).
- Create the Configuration File on the NirvaShare Host
- SSH into the Linux machine where NirvaShare is installed.
- As the root user, create a configuration file at the following path:
/var/nirvashare/config.properties- Add the following entries into the file.
ns_external_idp=true
ns_auto_create_user=true
ns_saml2_sp_company_name= <Your company name>
ns_saml2_sp_email=<your contact email id>
ns_saml2_sp_domain_url=https://<adminconsole domain name>
ns_saml2_idp_metadata_content=
- Make sure you replace with proper values for attribute names.
ns_saml2_sp_company_name
ns_saml2_sp_email
ns_saml2_sp_domain_url - Open the admin console URL https://<Your AdminConsole Domain>/saml/0/metadata
- This will display the XML metadata. Save this content into a local file system with file name as admin-console-metatdata.xml. This file will be required in later steps to configure SSO.
- Login to AWS Console as administrator.
- Go to IAM Identity Center service.
- Click on Users.
- Create a new user and make sure the username is the same as the one we created in NirvaShare AdminConsole at the beginning of the steps.
- Click on Applications from the left menu.
- Click on Add New Application in the top menu.
- Click on Add a custom SAML 2.0 application.
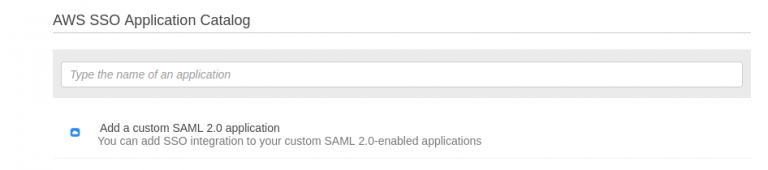
- Provide a name for the app as NirvaShare Admin.
- On the Application metadata section, browse and upload the file admin-console-metadata.xml that was obtained earlier.

- Click on Save Changes.
- This will create a new SAML Application.
- From the IAM Identity Center metadata section, click on the download link to get the SSO metadata file. Save this file into local file system with filename as aws-admin-metadata.xml
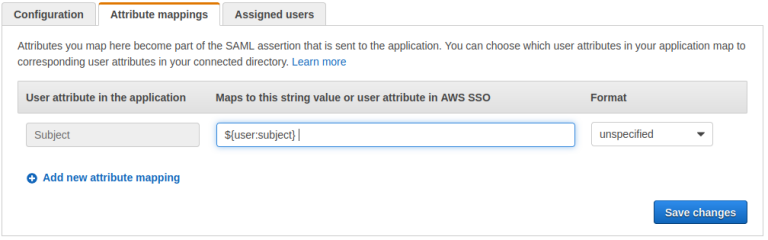
- Click on Attribute mappings tab and provide the value as ${user:subject} for Subject attribute.
- Click on the Assigned users tab and select the user that we created in earlier steps and assign it.
- Please note that, you can also use a group and assign multiple users to it. For now, we will deal with one user.
- Next, copy paste the content of the file aws-admin-metadata.xml into a text pad. Remove new lines and disable word wrap. Make the entire content as a single line. We will need this single line metadata content in the adminConsole configuration in next steps.
- SSH to Linux terminal where NirvaShare is installed, edit the below configuration file.
/var/nirvashare/config.properties- Copy pastes the metadata single line content from above steps into this file for the attribute value of ns_saml2_idp_metadata_content.
- Save the config.properties.
- Restart adminConsole service using below command.
docker restart nirvashare_adminNow open AdminConsole https://, this will redirect to AWS and perform SSO for authentication. Reach out to our support in case you require any help or assistance.