In this document, we will look into the process to create a login profile for Basic authentication that will provide a browser-based prompt for a username and password which should be entered, while accessing the shares.
Basic Authentication uses a simple and old way of authentication mechanism that uses a HTTP header to carry authentication information such as the username and the password in the encoded form each time a user sends a request to the server.
Steps to Create A Login Profile
In order to create a Login Profile in NirvaShare, you can make use of the following steps.
Log in to the Admin console of NirvaShare as an administrator.
Click on Login Profile from the left menu of the admin console.
Click on CREATE button from the top right corner.
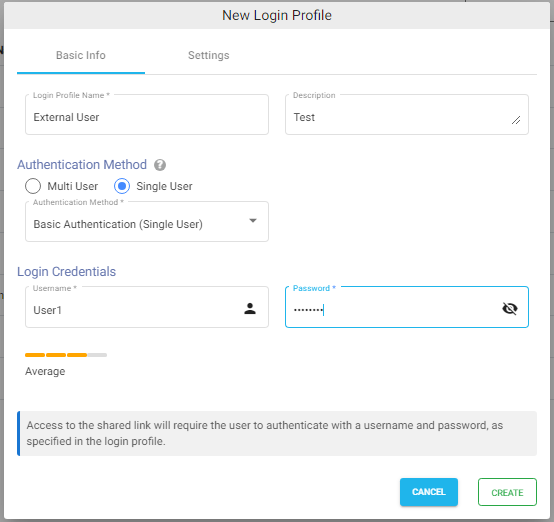
Under the Basic Info tab, provide a name for the Login Profile Name and an optional description.
For the Authentication Method, select Basic Authentication.
Provide a username and password of your choice. These are the credentials that the user will be prompted to enter while accessing the shared file/folder.