Public Access allows anyone with a share link to access shared files and folders without authentication. It is used for easy and unrestricted sharing of content. Users simply open the share link to access the shared content based on the configured permissions.
This document explains how to create a Public Access Login Profile and configure access to shared files and folders.
Login Profile
To create a Login Profile in NirvaShare, follow the steps below:
Log in to the Admin Console of NirvaShare as an administrator.
From the left navigation menu, click LoginProfiles.
Click CREATE in the top-right corner.
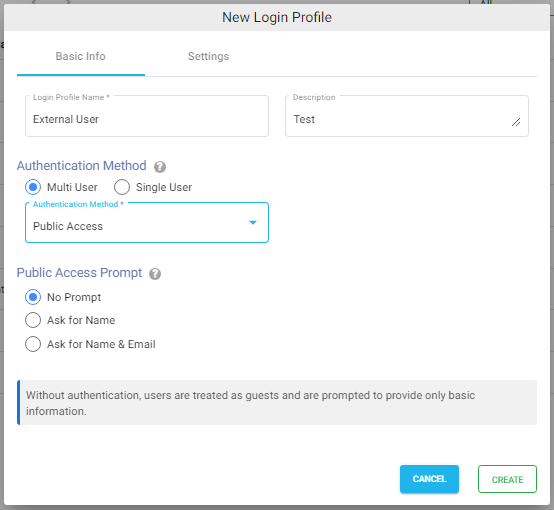
Under the Basic Info tab, enter the Login Profile Name and an optional Description.
Under Authentication Method, select MultiUser.
From the Authentication Method dropdown, select PublicAccess.
Public Access Prompt
Select the preferred prompt to control the information users must provide before accessing the shared content.
No Prompt – Users can access the shared content without entering any information. Askfor Name – Users are prompted to enter their name before accessing the shared content. The entered name is recorded for auditing purposes. AskforName&Email – Users are prompted to enter both their name and email address before accessing the shared content. The provided information is recorded for auditing purposes.
Note: The selected prompt determines the information collected from users before they access the shared content.