Login Profile - External Identity Provider or SSO
External Single Sign-On (SSO) is an authentication method that enables users to access shared files and folders by signing in with their existing organizational account through an external Identity Provider (IdP), such as Microsoft Entra ID, AWS IAM Identity Center, or Okta. This eliminates the need to maintain separate login credentials in NirvaShare while providing secure and centralized authentication.
This document explains how to create a Login Profile for External Single Sign-On (SSO) in NirvaShare. It also outlines the required configuration with the external Identity Provider to enable users to authenticate and securely access shared content.
Login Profile
To create a Login Profile in NirvaShare, follow the steps below:
- Log in to the Admin Console of NirvaShare as an administrator.
- From the left navigation menu, click Login Profiles.
- Click CREATE in the top-right corner.
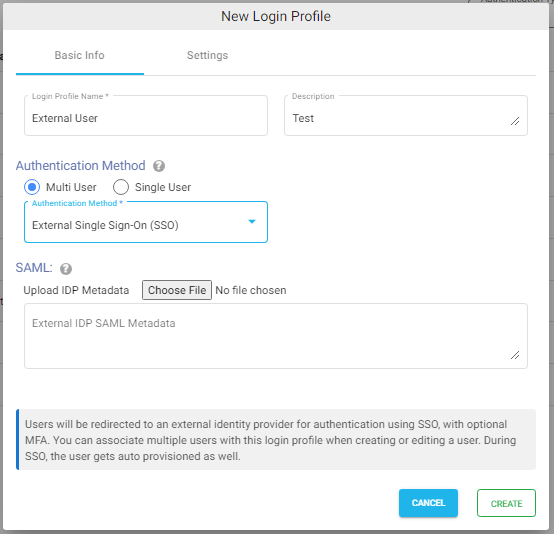
- Under the Basic Info tab, enter the Login Profile Name and an optional Description.
- Under Authentication Method, select Multi User.
- From the Authentication Method dropdown, select External Single Sign-On (SSO).
Settings
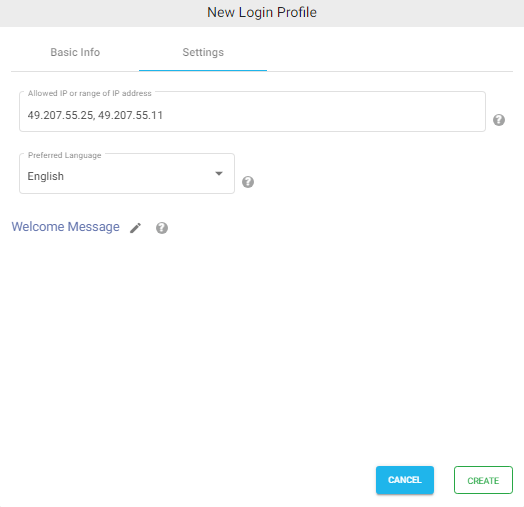
- Click the Settings tab.
- (Optional) To restrict access to specific IP addresses or an IP address range, refer to Access Restriction with IP Address.
- Select the preferred language in the Language field. By default, it is set to English.
- (Optional) To display a welcome message when users access the share, refer to Welcome Message for the Share.
- Click CREATE to create the Login Profile.
ACS and Entity Id/Metadata URL
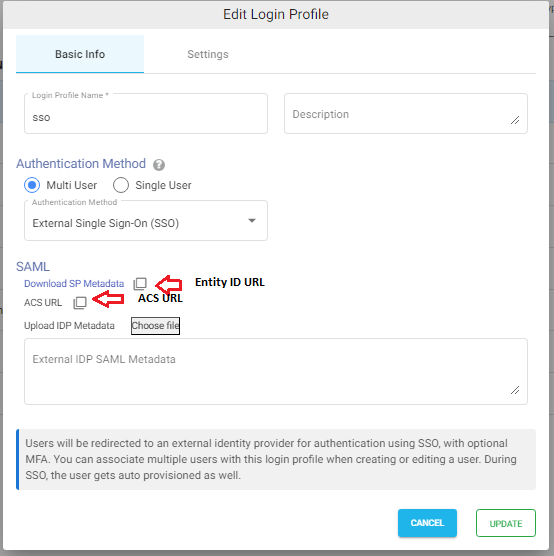
In most cases, while configuring the identity provider, you can directly upload NirvaShare SAML metadata file, but however with certain identity providers like Okta, instead of metadata file, you will require ACS and metadata URL. In those cases, use the ACS URL mentioned in the login profile. For Entity ID, use the Metadata URL.
- Edit the newly created Login Profile.
- Note down the Entity ID URL and ACS URL, these two values will be required while configuring Okta.
SAML Metadata
For external identity provider integration, you will require SAML metadata from the login profile of NirvaShare. To obtain the SAML metadata for the newly created login profile, follow the below steps.
- Edit the newly created login profile.
- Click on Download SP Metadata, or copy the URL to the clipboard and open it in a browser tab.
- This will download the XML metadata file for NirvaShare.
- This metadata file will be required to configure the external identity provider. So please save this file locally for further reference.
Note – At a later stage, you will also require SAML metadata from the identity provider and content of the same has to be pasted in the textbox and saved in the login profile.
Updating Login Profile with SAML Metadata
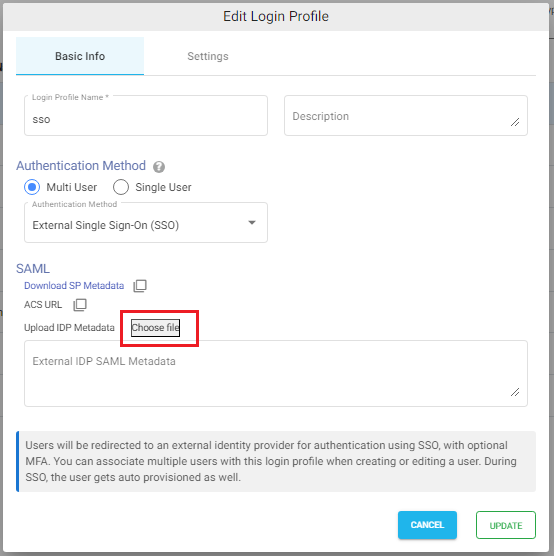
Make sure you have the SAML metadata XML file obtained from external IDP and follow the below steps to update SAML metadata in the Login Profile.
- Log in to Admin Console as an administrator.
- Click on Login Profiles from the left menu of the Admin Console.
- Edit the existing Login Profile of type External Single Sign On (SSO)
- In the Upload IDP Metadata section click on the Choose File button and select the metadata file.
- Click on UPDATE.