Search Documentation
< All Topics
Azure Blob/File Storage Configuration using Access Keys
Azure Storage configuration with NirvaShare can be performed using access keys obtained from Azure cloud console. In this document, let us look into the process of creation of access key and configuration of storage with NirvaShare.
Access keys
Before you could begin to configure NirvaShare, it is essential to get the access keys.
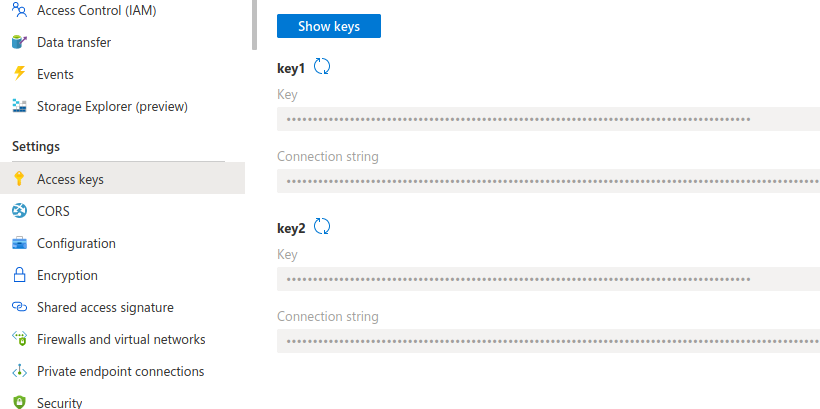
- To generate access keys, select your storage account from your Azure Portal.
- Within the storage account, click on Access Keys tab as shown below.
- Make a note of the connection string, this is required while configuring storage in Admin Console of NirvaShare.

Storage Configuration
The obtained access connection string will have to be configured in NirvaShare in order to provide access to storage and the below steps should be followed.
- Login to Admin Console of NirvaShare.
- Click on left menu Settings.
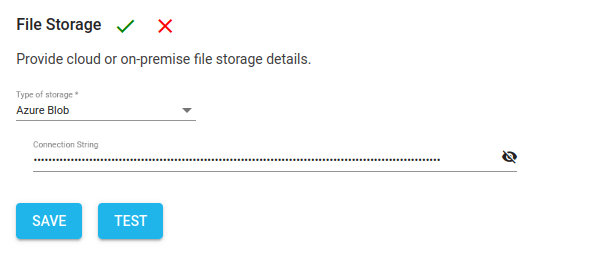
- Edit the File Storage under the settings page.
- Select Azure Blob or Azure Shares depending on the storage type.
- Provide the access connection string.
- Click on TEST to validate the access to storage.
- Save it.

Table of Contents
