< All Topics

Sharing A File Or Folder Using Form Based Authentication

Sharing a File/Folder from object storage with users can be done by creating a Share and granting restrictive access to it. In this document, we will walk you through creating a new Share, setting access permissions, and sharing the same with users.

New Share

From the NirvaShare Admin Console, click on the Storage tab from the left menu and browse through the files. Select any file or folder and right-click to get the context menu. Select Share to create a new share.

sha1

Basic Info

Provide a name and description for the Share. Before clicking on Create Share, move to the next tabs to set other configurations.

Authentication

Authentication can be set for the shared files. When users access this shared URL, authentication will be performed depending on the type that was set here. Form based authentication which we are using here is the simplest type of authentication, that will prompt the users to enter a single username and password in order to access the shared files and folders securely.

formbased

Alternatively, you can also create login profiles with different authentication mechanisms. To know the procedure for other types of authentication mechanisms, you can refer to the respective documentation.

Permissions

A fine level of access permission can be set here for a shared file or folder. You can also provide one or more email addresses to get notified whenever events such as a new file is uploaded, downloaded etc.  Email addresses have to be separated by a comma.

perm

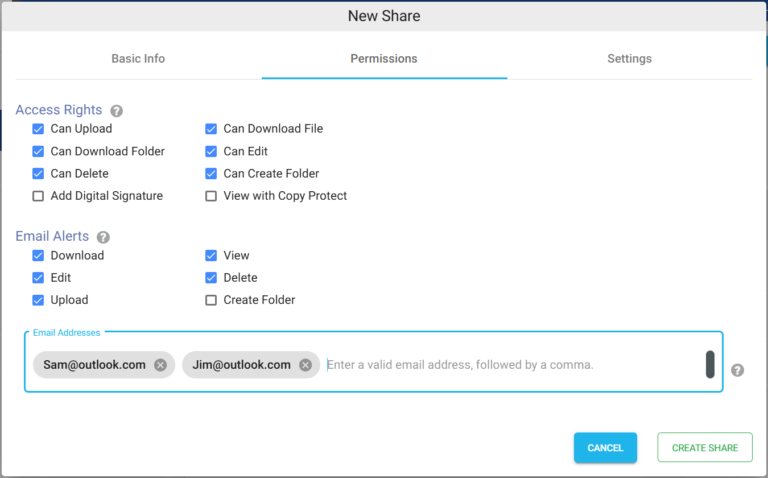
In case if you want to copy protect your shared documents, the same can be enabled here. With copy protection, users will not be able to download or copy text content from the document, they will only be able to view it without the ability to redistribute it. When copy protection is enabled, the download option will be automatically disabled. Only documents such as PDF, DOCX, and PPTX can be copy protected.

PDF documents can also be digitally signed while sharing. Users when they download the PDF document, it will automatically get digitally signed. To enable digital signing, please add respective certificates in the Settings tab.
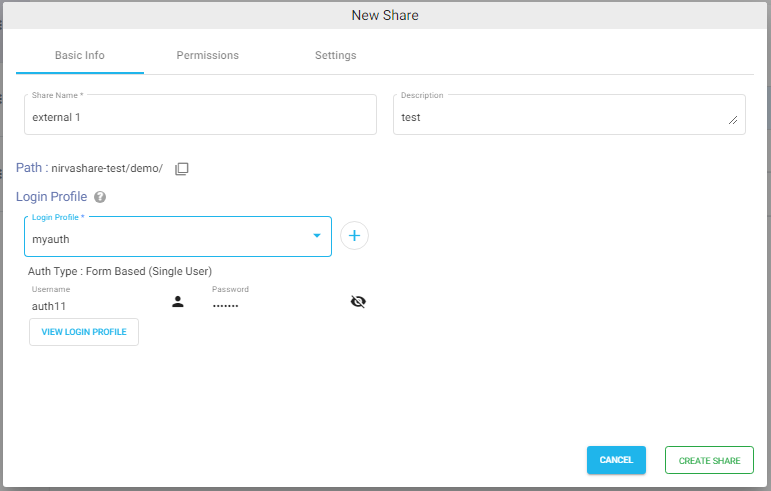
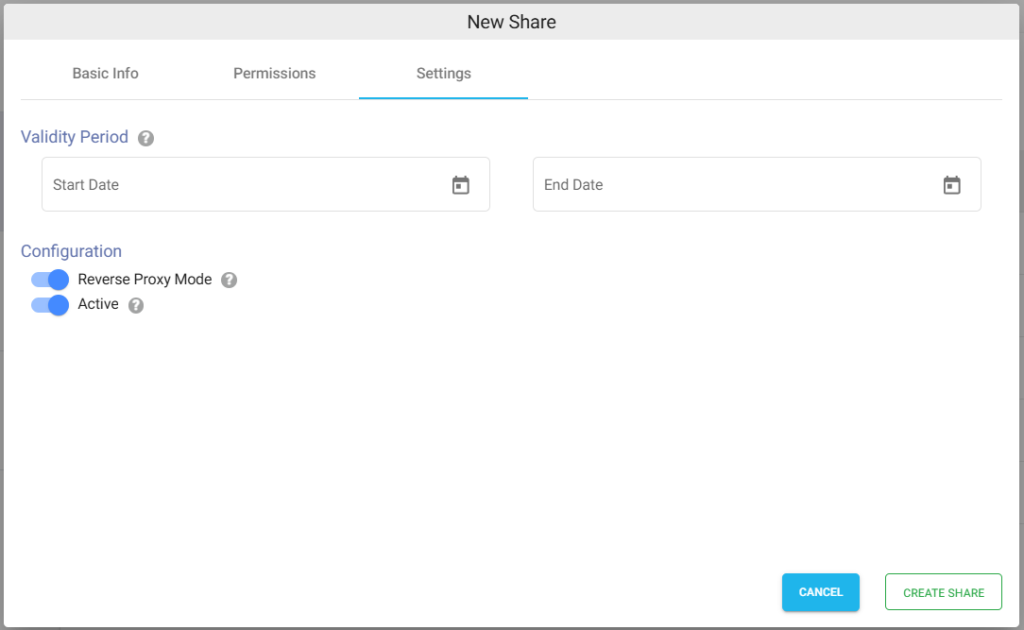
Settings

Start and end date can be specified for the Share  under Validity period, which will make Share to be available only for the specified duration.

shar5

Ready to Share

Once a Share is created, right-click on it to view a list of actions, that you can perform. Directly send email from here or copy the Shareable Link to share with target users.

shar10

Besides, all of these newly created shares are also available under Shares tab from the main left menu. Here share can be edited, deleted and modified.

Table of Contents